If you’re upgrading to or installing Windows 11, you’ve likely heard about two key requirements: TPM 2.0 and Secure Boot. While TPM gets a lot of attention, Secure Boot is just as important for your PC’s security. But what exactly is it, do you really need it enabled, and how do you turn it on? This guide will answer all your questions in simple terms.
Secure Boot: The Quick Answers (TL;DR)
| Question | Short Answer |
|---|---|
| What is Secure Boot? | A security feature that ensures your PC only boots with software trusted by the manufacturer. |
| Do I need it for Windows 11? | Your PC must be capable of Secure Boot to install Windows 11, but it’s not always required to be enabled. However, it is highly recommended. |
| Should I enable it? | Yes. For the vast majority of users, enabling it provides crucial protection against malware with no downsides. |
| Does it slow down my PC? | No. Secure Boot has no noticeable impact on your PC’s performance or gaming. |
What Is Secure Boot and Why Does It Matter?
Think of Secure Boot as a digital bouncer for your computer’s startup process. Before your operating system (Windows) even begins to load, Secure Boot checks to make sure all the low-level software—like the bootloader and critical system files—are signed with a valid, trusted digital signature from the manufacturer.
Its primary job is to protect you from malicious software like rootkits. These are dangerous types of malware that can load *before* your antivirus program starts, hiding deep within your system and taking complete control. By verifying the software at boot time, Secure Boot stops these attacks before they can even begin.
Should You Enable Secure Boot? Pros and Cons
For most Windows 11 users, the answer is a clear “yes.” However, there are specific situations where you might consider leaving it off.
| ✅ Pros of Enabling Secure Boot | ❌ Cons of Enabling Secure Boot |
|---|---|
| Provides powerful protection against boot-level malware and rootkits. | Can block some older hardware or unsigned drivers from working. |
| Ensures your operating system hasn’t been tampered with. | May prevent you from dual-booting other operating systems, like some versions of Linux. |
| It’s a key part of Windows 11’s modern security architecture. | Can be confusing to enable in the BIOS/UEFI for inexperienced users. |
Verdict: Unless you are an advanced user who needs to dual-boot Linux or use specific legacy hardware, you should keep Secure Boot enabled for maximum protection.
How to Check and Enable Secure Boot for Windows 11
Follow these two simple parts to check your status and then enable the feature if needed.
Part 1: Check Your Current Secure Boot Status
You can easily check if Secure Boot is enabled without having to reboot your computer.
- Press the Windows Key + R to open the Run dialog.
- Type
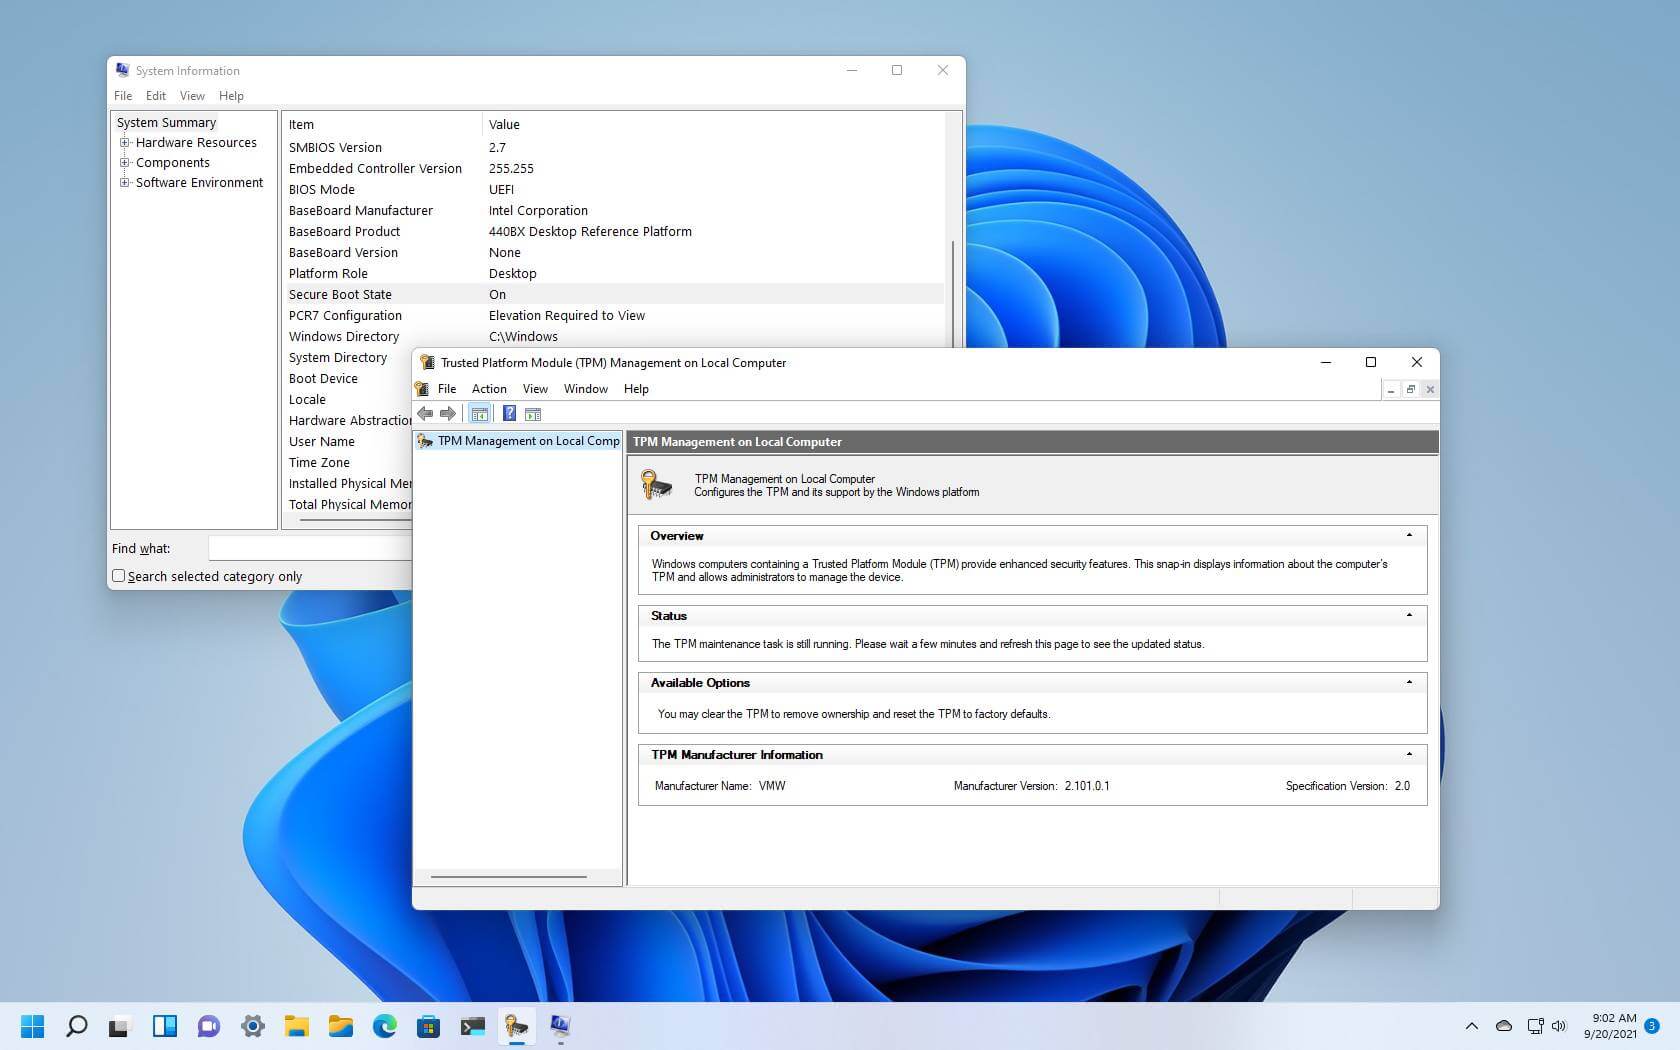
msinfo32and press Enter. This will open the System Information window. - In the “System Summary” view, look for the item named “Secure Boot State.”
- It will show either “On,” “Off,” or “Unsupported.” If it’s “On,” you’re all set! If it’s “Off,” proceed to Part 2.
Part 2: Enable Secure Boot in Your PC’s BIOS/UEFI
To turn on Secure Boot, you need to enter your computer’s BIOS (also known as UEFI on modern systems).
- Shut down your computer completely. Do not just restart.
- Turn your computer on and immediately start pressing the key to enter the BIOS. This key varies by manufacturer but is usually F2, F10, F12, or Delete. (The screen often displays the correct key for a few seconds on startup).
- Once in the BIOS/UEFI menu, look for a “Security,” “Boot,” or “Authentication” tab. The exact name and location will vary.
- Find the “Secure Boot” option.
- Set the option to “Enabled.”
- Navigate to the “Exit” tab and choose “Save Changes and Exit.” Your computer will restart with Secure Boot enabled.
Frequently Asked Questions (FAQ)
Can I disable Secure Boot after installing Windows 11?
Yes, you can turn off Secure Boot in the BIOS/UEFI at any time. However, doing so will disable a critical security layer and is not recommended unless you have a specific reason, like installing another operating system.
What’s the difference between UEFI and Secure Boot?
UEFI is the modern replacement for the old BIOS system—it’s the underlying firmware that initializes your hardware before the OS loads. Secure Boot is a specific security *feature* that runs within the UEFI environment.
Do I need TPM 2.0 as well?
Yes. For an official Windows 11 installation, your system must support and have both Secure Boot and TPM 2.0 enabled. They are separate but equally important security requirements.
Conclusion
Secure Boot is a fundamental security feature of modern PCs and a key component of Windows 11’s defense against malware. For the average user, enabling it is a simple, one-time task that provides significant protection with no performance penalty. Unless you’re an advanced user with specific needs for dual-booting, keeping Secure Boot on is the smartest choice for a safe and stable computing experience.