You plug your iPhone into your computer, expecting your photos or files to show up, and… nothing. Or maybe you’re trying to connect wirelessly and can’t figure out why it won’t sync. Sound familiar? As someone who’s troubleshooted this countless times, let me tell you: connecting an iPhone isn’t always plug-and-play, especially with Windows PCs.
Let’s cut through the confusion. There are different ways to connect, each with its own purpose. This guide gives you the straight dope on the methods that actually work for transferring files, syncing data, or sharing your internet connection.
The #1 Rule: Use a Good Cable (Wired Connection)
This is still the most reliable way to connect, especially for large file transfers or initial setups. But even this trips people up.
Step 1: The Right Cable & Port
You need a USB cable that supports *data transfer*, not just charging. The cable that came with your iPhone is perfect. Newer iPhones use USB-C, older ones use Lightning.
Rookie Mistake: Using a cheap, third-party charging-only cable. It will charge the phone, but your computer will never see it. Also, try different USB ports on your computer; sometimes a port can be faulty.
Step 2: Trust This Computer? (Don’t Skip This!)
The first time you connect your iPhone to a new computer, your phone will pop up a message asking, “Trust This Computer?”. You *must* tap “Trust” and enter your passcode. If you accidentally hit “Don’t Trust,” unplug the phone, wait a few seconds, and plug it back in. The prompt should reappear.
Step 3: Finding Your iPhone
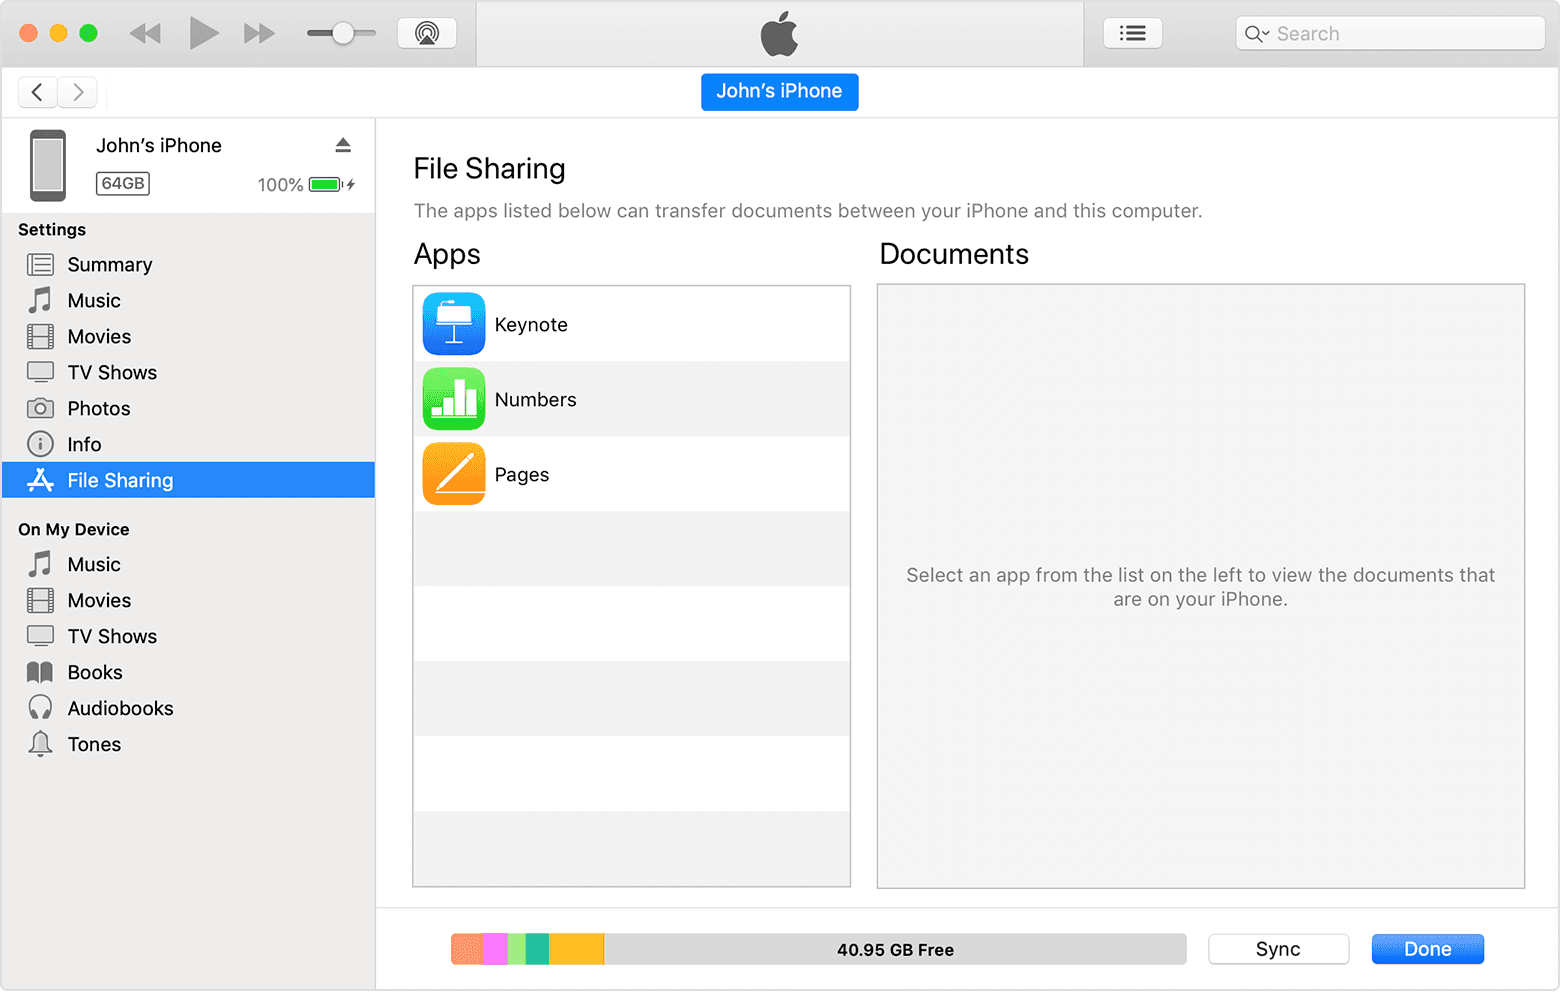
- On a Windows PC: You need the right drivers. The easiest way is to install the Apple Devices app from the Microsoft Store (or the older iTunes if you have an earlier Windows version). Once installed and you’ve “Trusted” the computer, your iPhone should appear in File Explorer under “This PC” like a camera or drive, allowing you to access photos and videos in the DCIM folder. For full syncing (music, backups), you’ll use the Apple Devices app/iTunes.
- On a Mac: It’s much simpler. Connect your iPhone. Open Finder. Your iPhone will appear in the sidebar under “Locations.” Click it to access sync options, backups, and file management for supported apps.
Pro-Tip (Windows Users): If your iPhone *still* doesn’t show up after installing the drivers and trusting, restart both your PC and your iPhone. It sounds basic, but it solves 80% of connection issues.
Going Wireless: Wi-Fi Syncing & Handoff (The *Real* Wireless)
For syncing and convenience, Wi-Fi is the way to go. But you *must* set it up with a cable first.
Setting Up Wi-Fi Sync
- Connect your iPhone to your computer with a USB cable (just this one time).
- On PC: Open the Apple Devices app (or iTunes). Select your iPhone, go to the “General” tab, and check the box that says “Sync with this iPhone over Wi-Fi.
- On Mac: Open Finder. Select your iPhone in the sidebar, go to the “General” tab, and check the box that says “Show this iPhone when on Wi-Fi.”
- Click “Apply.”
Now, as long as your iPhone and computer are on the same Wi-Fi network and the iPhone is charging, it will sync automatically or when you initiate it from the computer.
Pro-Tip: Features like **Handoff** and **Universal Clipboard** (copy on iPhone, paste on Mac/PC with iCloud for Windows) also rely on both devices being on the same Wi-Fi and having Bluetooth enabled for *discovery*.
What About Bluetooth? (It’s NOT for File Transfer!)
This is the biggest point of confusion. Can you connect your iPhone to your PC or Mac via Bluetooth? Yes. Can you use that connection to transfer photos or files? **Absolutely not.**
Rookie Mistake: Trying for hours to pair your iPhone and PC via Bluetooth to send photos. It will never work. Apple designed iOS this way.
What Bluetooth *is* used for between iPhone and computers:
- Device Discovery: For features like Handoff and AirDrop (Mac only).
- Personal Hotspot: You can share your iPhone’s internet via Bluetooth (though Wi-Fi is faster).
- Connecting Accessories: Connecting things like AirPods, mice, keyboards (to the computer, not typically the iPhone).
For wireless file transfer between iPhone and Mac, use **AirDrop**. Between iPhone and PC, your best bets are **iCloud Drive**, **OneDrive**, **Google Drive**, or transferring via Wi-Fi sync/USB.
Sharing Your Internet: Personal Hotspot (Tethering)
This is another type of “connection,” but it’s specifically for sharing your iPhone’s cellular data connection with your computer. The video below likely covers this.
You have three ways to do this:
- Wi-Fi Hotspot (Easiest): Go to Settings > Personal Hotspot on your iPhone and toggle “Allow Others to Join” on. Find the iPhone’s network name in your computer’s Wi-Fi list and connect using the provided password.
- Bluetooth Hotspot (Slower): Pair your iPhone and computer via Bluetooth first. Then, enable Personal Hotspot on the iPhone. On your computer, join the “Personal Area Network” using the iPhone. It’s slower but uses less battery.
- USB Tethering (Fastest & Charges): Connect your iPhone via USB. Trust the computer. Enable Personal Hotspot on the iPhone. Your computer should automatically detect it as a network connection (sometimes called “Ethernet”). This is the fastest method and keeps your phone charged.
Pro-Tip: Check your mobile carrier plan. Most plans have limits on hotspot data usage. Streaming video or large downloads over hotspot can eat through your allowance quickly.
Troubleshooting: Common Connection Fails
If your computer *still* won’t recognize your iPhone via USB, try these:
| Problem | Pro Solution |
|---|---|
| No “Trust This Computer?” prompt | Go to iPhone Settings > General > Transfer or Reset iPhone > Reset > Reset Location & Privacy. Then reconnect. |
| iPhone shows charging, but not in PC File Explorer/Apple Devices App | 1. Use a different USB port. 2. Use a different (known good) data cable. 3. Reinstall Apple Devices/iTunes. 4. Restart both devices. |
| iPhone disconnects randomly | Often a bad cable or loose port. Could also be iOS’s “USB Restricted Mode” kicking in (Settings > Face ID & Passcode > Allow Access When Locked > USB Accessories – make sure it’s ON if needed). |
| Wi-Fi Sync not working | Ensure both devices are on the exact same Wi-Fi network. Restart your router. Re-check the Wi-Fi sync box in Finder/Apple Devices app. |
FAQs: Quick Answers
Can I transfer photos from iPhone to PC wirelessly?
Yes! The easiest ways are:
- iCloud Photos: Enable it on your iPhone and install iCloud for Windows on your PC. Photos sync automatically.
- Cloud Services: Use OneDrive, Google Photos, or Dropbox apps.
- Wi-Fi Sync: After initial setup, you can sync photos via the Apple Devices app or iTunes over Wi-Fi.
Why won’t my iPhone connect to my PC Bluetooth for files?
Apple doesn’t allow file transfer via Bluetooth between iOS and Windows/macOS. It’s a limitation of the operating system. Use cloud services, email, or USB instead.
How do I make my PC find my iPhone’s Bluetooth?
Make sure Bluetooth is on for both. On PC, go to Settings > Bluetooth & devices > Add device. On iPhone, just have Bluetooth turned on (it’s usually discoverable when the Bluetooth settings screen is open). Remember, this pairing is mainly for Personal Hotspot or Handoff features, *not* file transfer.
Conclusion: Use the Right Tool for the Job
Connecting your iPhone and computer doesn’t have to be a headache. Just remember the basics:
- USB Cable: Most reliable for file access, backups, and initial setup.
- Wi-Fi Sync: Convenient for automatic syncing once set up.
- Bluetooth: Useful for accessory pairing and hotspot discovery, **NOT for file transfer**.
- Personal Hotspot: For sharing your phone’s internet connection.
Know what you want to achieve, choose the right method, and always start with a good cable and the “Trust” prompt. That’s how you connect your iPhone to your computer like a pro.