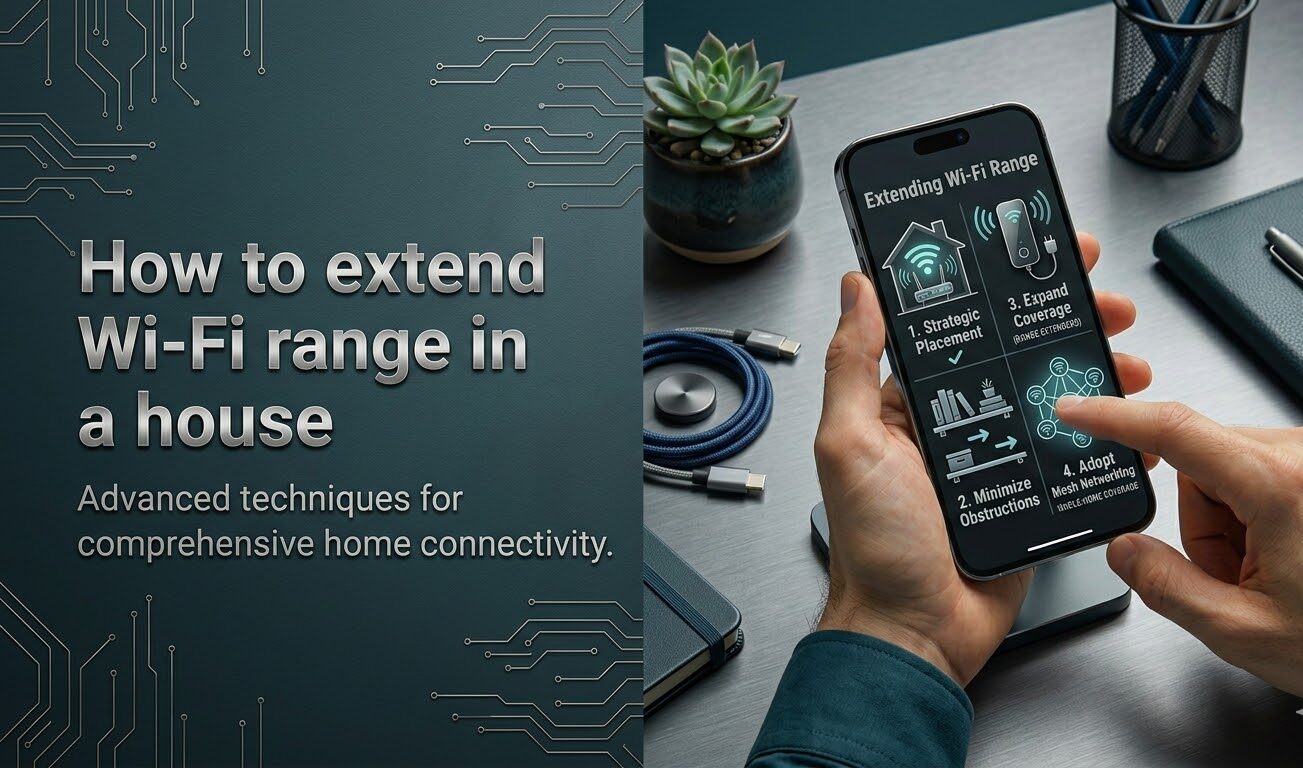

You get full bars standing next to the router, but the signal drops to one bar in the bedroom and disappears entirely in the garden. It’s one of the most frustrating experiences in a modern home — and it’s almost always fixable without calling an engineer or spending a fortune.
This guide covers every solution in order from cheapest to most expensive: free placement tweaks that often solve the problem completely, through to Wi-Fi extenders, powerline adapters, wired access points, and full mesh systems for large homes. Start at the free fixes — you may not need to spend anything at all.
⚡ Jump to your situation
- Try the free fixes first — move the router and adjust its settings before buying anything
- One dead zone (garden, bedroom, one room) — a Wi-Fi extender or powerline adapter is usually all you need
- Solid brick or stone walls blocking signal — powerline adapters work through the electrical wiring and bypass walls entirely
- Large house, whole-home coverage — a mesh Wi-Fi system gives seamless coverage across every room
- Renting and can’t drill or install cables — extenders and wireless mesh nodes require no permanent installation
Cost range: Solutions in this guide run from free (repositioning your router) to around £300 for a full mesh system covering a large detached house. The cheapest fix often works just as well as the most expensive one.
Why does Wi-Fi get weak in certain rooms?

Before spending money on a solution, it helps to understand what is actually blocking your signal — because different causes have different fixes.
Distance and the inverse square law
Wi-Fi signal strength drops with the square of distance. Double the distance from your router, and the signal is roughly four times weaker — not twice as weak. This means even moving the router a few metres closer to a problem area can make a meaningful difference.
What is blocking the signal
Different building materials absorb Wi-Fi signal by very different amounts. From worst to best:
- Concrete and solid brick walls — the biggest signal killers. Old Victorian and Edwardian terraces with solid brick walls can reduce signal by 10–15 dB per wall, which is enough to cut range in half or more
- Plaster walls with metal lath — common in older homes, acts almost like a Faraday cage
- Standard plasterboard (drywall) — modest impact, most modern homes cope fine
- Wood and glass — minimal absorption
- Floors — signal passing diagonally through a floor travels through more material than a wall, so multi-storey homes tend to have the worst dead zones in upstairs rooms
2.4 GHz vs 5 GHz: which band to use where
Most modern routers broadcast two separate Wi-Fi bands. Understanding the difference helps you choose the right solution:
- 2.4 GHz — longer range, better wall penetration, but slower speeds and more congested (shared with microwaves, baby monitors, and neighbouring routers)
- 5 GHz — faster speeds and less congestion, but shorter range and struggles to penetrate walls
For rooms close to the router, connect devices to 5 GHz. For far rooms or through thick walls, 2.4 GHz reaches further. If you are buying a Wi-Fi extender, a dual-band model that uses 5 GHz for the connection back to your router and 2.4 GHz for devices is significantly better than a single-band model.
Channel congestion and interference
In a block of flats or a terraced street, dozens of neighbouring routers may be broadcasting on the same Wi-Fi channel as yours — each one interfering with the others. This causes slow speeds and dropped connections even when signal strength looks fine.
Free self-diagnosis tip: Download a Wi-Fi analyser app before buying anything — Wi-Fi Analyzer (Android, free) or Network Analyzer (iOS, free). Walk through your home and check signal strength room by room. The app also shows which Wi-Fi channels your neighbours are using so you can switch to a cleaner one.
Free fix 1 — optimise your router placement
This is the single most impactful change you can make, and it costs nothing. A poorly placed router is the root cause of dead zones in a surprising number of homes. Try this before buying any hardware.
Place the router centrally
Your router should sit as close as possible to the geometric centre of the space you want to cover — not in the corner where the ISP engineer happened to install it. Every metre you move it towards the centre reduces dead zones. If your router is currently in the hallway near the front door and your dead zone is at the back of the house, moving it to a central living room shelf can solve the problem entirely.
Raise it off the floor
Wi-Fi signal radiates outward and slightly downward from the router’s antennas. A router sitting on the floor wastes half its signal into the ground. Place it on a shelf or desk at around 1–1.5 metres off the floor for the best horizontal coverage. For a two-storey home, placing the router on the first floor rather than the ground floor can dramatically improve upstairs coverage.
Position the antennas correctly
If your router has external antennas:
- Single-storey home: keep all antennas pointing straight up (vertical). This maximises the horizontal spread of the signal across one floor.
- Multi-storey home: angle one antenna horizontally (pointing to the side). This pushes some signal up and down through the floors while the vertical antenna covers the same floor.
Clear the immediate area
Metal objects within about one metre of the router reflect and absorb signal. Common culprits include:
- TV units and entertainment cabinets (especially if the router is inside a closed cabinet — never do this)
- Refrigerators and other large metal appliances
- Microwave ovens — these also emit interference on the 2.4 GHz band when in use
- Cordless phone bases and baby monitors
Even moving the router 30 cm away from a TV and out of a cabinet can produce a noticeable improvement.
Realistic expectation: Good router placement can extend range by 10–20% and eliminate dead zones caused purely by poor positioning. If you still have dead zones after repositioning and following the settings fixes below, hardware is your next step.
Free fix 2 — router settings that improve range
Most people never log into their router’s admin panel. These settings are free to change, take a few minutes, and can make a genuine difference — particularly in built-up areas with channel congestion.
Switch to a less congested Wi-Fi channel
This is the single most impactful router setting change and takes about two minutes:
- Open a browser and go to your router’s admin panel — usually
192.168.1.1or192.168.0.1(check the label on your router if unsure). Default username and password are also on the label. - Navigate to the Wireless or Wi-Fi settings section
- Check your Wi-Fi analyser app to see which channels your neighbours are using
- For 2.4 GHz, switch to channel 1, 6, or 11 — these three channels do not overlap with each other. Avoid any channel your neighbours are heavily using.
- For 5 GHz, any channel works since there are many more non-overlapping options
- Save and allow the router to restart
Update the router firmware
Router manufacturers regularly release firmware updates that improve Wi-Fi performance, fix bugs in the wireless stack, and sometimes extend range. Most routers have a firmware update option in the admin panel under Advanced, System, or Maintenance. Some update automatically if the option is enabled.
Enable band steering
If your router is dual-band and supports band steering (sometimes called Smart Connect), enabling it lets the router automatically connect each device to the best band — faster 5 GHz for nearby devices, longer-range 2.4 GHz for devices further away. Check your router’s wireless advanced settings.
Check transmit power
Some routers allow manual adjustment of transmit power. Navigate to Wireless → Advanced Settings and look for a Transmit Power or TX Power setting. If it is set to Medium or Low, change it to High. This is only an option on certain router models but is worth checking.
Reboot your router monthly
Router performance degrades over time as memory fills with session data and cached information. A monthly restart clears this and often reconnects the router to the best channel conditions. Some routers support scheduled reboots — check the admin panel under Maintenance or Advanced.
Solution 1 — Wi-Fi extender (repeater)
Best for: One specific dead zone | Cost: £20–£60 | Difficulty: Very easy
A Wi-Fi extender (also called a repeater or booster) is the most popular and widely available solution. It receives your router’s existing Wi-Fi signal, amplifies it, and rebroadcasts it — effectively pushing the signal further into your home.
How to set up a Wi-Fi extender
- Plug the extender into a wall socket roughly halfway between your router and the dead zone — it must still receive a strong signal from the router (at least 50% strength)
- Press the WPS button on your router, then the WPS button on the extender within two minutes — most modern extenders pair automatically this way
- Alternatively, connect to the extender’s temporary setup network and follow the app or web-based wizard
- Once set up, devices in the dead zone connect to the extender rather than the router
The half-speed problem — what most guides don’t tell you
⚠ Single-band extenders halve your speed. Most budget extenders use a single radio to both receive the signal from your router and rebroadcast it to your devices. Because the radio has to take turns doing both jobs, the available bandwidth is roughly halved. A connection delivering 200 Mbps from the router delivers only about 100 Mbps through a single-band extender.
The fix: Buy a dual-band extender that uses one band (usually 5 GHz) as a dedicated link back to the router and the other band (2.4 GHz or 5 GHz) for your devices. This dedicated backhaul band eliminates the speed penalty. These models typically cost £40–£60 rather than £20–£30 and are worth the extra spend.
The separate network name issue
Basic extenders create a second network with a different name (e.g. your router broadcasts “HomeWiFi” and the extender broadcasts “HomeWiFi_EXT”). Your devices do not switch automatically between the two as you move through the house — you have to manually connect to whichever is closer. More expensive extenders can broadcast the same network name as your router, giving better (though still imperfect) roaming.
Where to place the extender
The most common mistake is placing the extender too close to the dead zone rather than halfway between the router and the dead zone. If the extender receives a weak signal from the router, it rebroadcasts a weak signal — which defeats the purpose. Aim for a location where your phone shows at least two to three bars of your main Wi-Fi network, then plug the extender in there.
When a Wi-Fi extender is the right choice
- You have one specific dead zone in an otherwise well-covered home
- You are renting and cannot install cables or drill holes
- Your home has mostly open-plan layout with few thick walls
- Budget is under £60 and the dead zone is not used for demanding tasks like 4K streaming or video calls
When to consider a different solution
- Multiple dead zones throughout the house — you would need multiple extenders, at which point a mesh system is more cost-effective
- Solid brick or stone walls between the router and the dead zone — the extender may not receive a strong enough signal to relay
- The dead zone is used for demanding tasks — video calls, 4K streaming, gaming — where the half-speed penalty becomes noticeable
Solution 2 — Powerline adapters
Best for: Thick walls, multi-storey homes, solid brick or stone properties | Cost: £30–£80 | Difficulty: Easy
Powerline adapters are the most underrated solution for extending Wi-Fi in older British homes with solid walls. Instead of trying to push a Wi-Fi signal through thick brick or concrete, they use your home’s existing electrical wiring as a network cable — bypassing the walls entirely.
How powerline adapters work
A powerline kit comes with two adapters. The first plugs into a wall socket near your router and connects to it via a short Ethernet cable. The second plugs into any wall socket in the room where you need Wi-Fi. Data travels between the two adapters through the electrical wiring in your walls — the same wiring that powers your lights and sockets.
The second adapter either broadcasts Wi-Fi directly (Wi-Fi powerline kits) or provides an Ethernet port you can plug a device into (Ethernet-only kits). Wi-Fi kits are simpler to set up; Ethernet-only kits give better performance if you pair them with a separate wireless access point.
How to set up a powerline kit
- Plug Adapter A into a wall socket close to your router
- Connect Adapter A to your router using the included short Ethernet cable
- Plug Adapter B into a wall socket in the room where you need coverage
- Press the Pair button on Adapter A, then the Pair button on Adapter B within two minutes
- The adapters link automatically — the indicator light turns solid when connected
- If using a Wi-Fi powerline kit, connect your devices to the new Wi-Fi network name shown on the adapter’s label (or configure it via the app)
Important: Plug powerline adapters directly into wall sockets — never into extension leads or surge protectors. The power filtering in these strips blocks the network signal. If you need a socket free, buy a passthrough powerline adapter that has a standard socket built into the front face.
Limitations to know before buying
- Same electrical circuit required: Powerline adapters work best when both sockets are on the same electrical ring circuit. In some houses, different circuits serve different floors or extensions — the adapters may work but at reduced speed, or not at all
- Old wiring reduces speed: Pre-1990s wiring introduces more signal loss. Real-world speeds on older wiring are typically 50–100 Mbps rather than the headline 1,000 Mbps spec
- Separate electricity meters: Will not work across separate meters — outbuildings, granny flats, or converted garages on a separate supply need a different solution
- Not suitable for outdoor buildings for this reason — use a dedicated outdoor access point or long-range extender instead
When powerline adapters are the right choice
- Solid brick, stone, or concrete walls are killing the Wi-Fi signal between floors or rooms
- Multi-storey Victorian or Edwardian house where Wi-Fi barely penetrates the floors
- You want full router speed in the target room without a wireless speed penalty
- You want a clean solution with no visible cables across the house
Solution 3 — Wired access points
Best for: Maximum performance, multiple dead zones, permanent installation | Cost: £40–£100 (plus cable) | Difficulty: Moderate (involves running an Ethernet cable)
A wired access point is the gold standard for extending Wi-Fi — it delivers full router speed to any room in the house, supports seamless roaming, and is completely immune to wireless interference. The only requirement is running an Ethernet cable from your router to the access point’s location.
What makes a wired access point different from an extender
The key difference is the backhaul — how the access point connects back to your router. An extender uses a wireless backhaul (which halves speeds). An access point uses a wired Ethernet backhaul, so there is no speed penalty. Devices connected to the access point get the same speeds as if they were sitting next to the router.
Understanding Power over Ethernet (PoE)
Most dedicated home access points are powered via PoE — they receive both data and electrical power through the same Ethernet cable. This means you do not need a mains socket at the access point’s location, which makes installation much more flexible (ceiling mounting, top of a bookcase, end of a hallway).
To use PoE, you need either a PoE network switch near the router (£20–£30 for a basic 4-port model) or a PoE injector — a small device that sits between the router and the Ethernet cable and injects power into it (£10–£20). Most access point kits include a power adapter as an alternative if you prefer to use a mains socket instead.
How to run the Ethernet cable
Running a cable between rooms or floors is the main effort involved. Options from easiest to most involved:
- Along skirting boards: A flat Ethernet cable (sometimes called an ultra-thin or ribbon cable) sits neatly under skirting boards or along the top of skirting. A 20–30m flat cable costs about £8–£12 and can be painted to match the wall colour
- Under carpet: A very flat Ethernet cable can run under carpet without a visible bump, especially along the edge where carpet meets skirting
- Through wall cavities: Feeding cable through the cavity between floors or walls is cleaner but requires a cable fish kit and some patience
- Via a powerline adapter as the backhaul: If running cable is not possible, connect the access point to a powerline adapter instead of directly to the router. You lose some speed but gain much better performance than a wireless extender
How to set up a wired access point
- Run the Ethernet cable from your router (or a switch connected to the router) to the access point location
- Connect the Ethernet cable to the access point’s WAN or LAN port (check the manual — different models use different port labels)
- Power the access point via PoE injector, PoE switch, or mains adapter
- Download the manufacturer’s app (most modern access points use a smartphone app for setup)
- Set the access point to broadcast the same network name (SSID) and password as your main router
- Devices will now automatically roam between the router and access point as you move through the house
Same SSID = seamless roaming: When the access point broadcasts the same network name and password as your main router, your phone and laptop automatically connect to whichever one has the strongest signal as you move through the house — just like a professional office Wi-Fi setup. This is the main advantage over a basic extender.
When a wired access point is the right choice
- You are able to run an Ethernet cable (even along skirting boards)
- You need the best possible speeds in the target room
- You have multiple dead zones and want to cover them properly
- You want seamless roaming for phones and laptops as you move through the house
- Long-term permanent setup rather than a quick temporary fix
Solution 4 — Mesh Wi-Fi systems
Best for: Large homes, whole-house coverage, many connected devices | Cost: £100–£350 | Difficulty: Easy (wireless setup) to Moderate (wired backhaul)
A mesh Wi-Fi system is the most powerful and user-friendly whole-home solution — but it is also the most expensive, and not every home actually needs one. This section explains what mesh does, how it differs from extenders, and who genuinely benefits from the investment.
How mesh Wi-Fi works
A mesh system consists of a main node (which connects to your router or replaces it entirely) and one or more satellite nodes placed around the house. All nodes communicate with each other and share the same network name. Your devices roam automatically between nodes as you move through the house — seamlessly, without disconnecting or requiring you to choose a different network.
Unlike an extender, every mesh node is an equal participant in the network. There is no single point of relay and no artificial limit on how many hops the signal can take between nodes.
Mesh vs Wi-Fi extender — the key differences
| Feature | Wi-Fi extender | Mesh system |
|---|---|---|
| Roaming between units | Manual (or imperfect auto) | Fully seamless |
| Network name | Often separate SSID | Single shared SSID |
| Speed penalty | Up to 50% on single-band | None (wired) or minimal (tri-band wireless) |
| Setup | Simple plug-in | App-guided, easy |
| Scalability | Limited (1–2 hops) | Add nodes as needed |
| Cost | £20–£60 | £100–£350 |
Wireless vs wired mesh backhaul
Mesh nodes need to communicate with each other — this communication link is called the backhaul. There are two types:
- Wireless backhaul: Nodes talk to each other over Wi-Fi. Convenient and requires no cables, but uses some bandwidth for node-to-node traffic, which can reduce the speeds available to your devices
- Wired backhaul: Nodes connect to each other (and to the main router) via Ethernet cables. Full performance, no speed penalty, lower latency. If you can run cables between nodes, always choose wired backhaul — it makes a significant difference in homes with many devices or high-demand usage
Most consumer mesh systems support both — you can start with wireless and add Ethernet backhaul cables later.
Tri-band mesh: why it matters
Entry-level dual-band mesh systems share their two Wi-Fi bands between device connections and the node-to-node backhaul. Tri-band systems add a third radio band used exclusively for backhaul — leaving both other bands entirely free for your devices. This eliminates nearly all the wireless speed penalty and makes a meaningful difference in homes with 20+ connected devices or heavy usage. Tri-band mesh systems typically cost £200–£350.
Who actually needs a mesh system
Be honest with yourself before spending £150–£300. A mesh system is worth the investment if:
- Your home is larger than approximately 150m² (a large four or five bedroom house)
- You have three or more floors and need coverage on all of them
- You have 15 or more connected devices (smart home, multiple TVs, phones, laptops, tablets)
- People in the household frequently move between rooms while streaming or on video calls and experience disconnections
A three-bedroom semi-detached home, a flat, or a home with one or two specific dead zones almost certainly does not need a full mesh system. A well-placed extender, a powerline adapter, or a single wired access point will solve the problem at a fraction of the cost.
Mesh system cost tiers
- Entry (£100–£150): TP-Link Deco M4/M5 class, Amazon Eero — Wi-Fi 5, adequate for 2–3 bedroom homes up to ~150m²
- Mid (£150–£250): TP-Link Deco XE75, Eero Pro 6E class — Wi-Fi 6 or 6E, faster backhaul, better for larger homes and more devices
- Premium (£250–£350): Netgear Orbi, TP-Link Deco XE200 class — Wi-Fi 6E, tri-band, dedicated backhaul radio, for the largest homes and highest device counts
Which solution is right for your home?
Use this table to identify the best match for your specific situation:
| Situation | Recommended solution | Approx. cost | Speed penalty? |
|---|---|---|---|
| Dead zone caused by poor router position | Reposition router (free fix 1) | Free | None |
| Slow speeds in a nearby room, open-plan home | Channel change + firmware update (free fix 2) | Free | None |
| One dead zone, thin walls, renting | Dual-band Wi-Fi extender | £40–£60 | Minimal (dual-band) |
| Solid brick / stone walls, multi-storey | Powerline adapter kit (Wi-Fi) | £45–£80 | None |
| Best performance, can run a cable | Wired access point | £50–£100 | None |
| Large house (150m²+), whole-home coverage | Mesh Wi-Fi system (2–3 nodes) | £100–£250 | None (wired) / minimal (tri-band) |
| Very large house or outbuilding | Mesh system + wired backhaul or outdoor AP | £200–£350 | None |
Check your ISP router first: Before buying any hardware, call your ISP or log into your account online and ask whether a router upgrade is available. Many ISPs have moved to newer, more powerful router models. A free or subsidised upgraded router from your ISP often outperforms an older router combined with an aftermarket extender.
Measure your improvement
Run a speed test at Speedtest.net or using the Speedtest app in the dead zone before making any changes. Note the result. After your fix is in place, run the same test from the same location. This gives you a concrete, objective measure of improvement rather than a subjective impression — and confirms whether the solution has worked before you return any hardware.
Summary — all solutions at a glance
| Solution | Best for | Cost | Speed penalty | Install difficulty |
|---|---|---|---|---|
| Router repositioning | Poor placement causing dead zones | Free | None | Very easy |
| Router settings | Channel congestion, outdated firmware | Free | None | Easy |
| Wi-Fi extender | One dead zone, thin walls, renters | £20–£60 | Up to 50% (single-band) | Very easy |
| Powerline adapters | Thick walls, multi-storey homes | £30–£80 | None | Easy |
| Wired access point | Best performance, permanent install | £40–£100 | None | Moderate |
| Mesh Wi-Fi system | Large homes, whole-house seamless coverage | £100–£350 | None (wired) / minimal (tri-band) | Easy–Moderate |
Frequently asked questions
Does a Wi-Fi extender slow down internet speed?
A single-band Wi-Fi extender typically halves the available bandwidth because it uses the same radio to both receive signal from the router and rebroadcast it to devices — the radio has to take turns, which cuts throughput by roughly 50%. A dual-band extender avoids this by using one band as a dedicated link back to the router and the other band for your devices, so the speed penalty is minimal. If speed is important, buy a dual-band extender (usually £40–£60) rather than the cheapest single-band model.
Is a mesh Wi-Fi system worth it for a 3-bedroom house?
Usually not — and that is an honest answer. A three-bedroom semi-detached or terraced house is typically 80–120m², which a single good router or a router-plus-extender combination covers adequately. A mesh system is worth the investment for homes over approximately 150m², homes with three or more floors, or households with 15 or more connected devices. For smaller homes, a £45 powerline adapter or £50 wired access point usually delivers better value than a £150 entry mesh system.
What is the typical range of a Wi-Fi extender?
Most Wi-Fi extenders are rated to extend coverage by 100–200m² in ideal conditions — which means an open-plan space with no walls. In a typical UK home with plasterboard walls, the realistic extension is 30–60m² per extender. Through solid brick walls, even less. The Wi-Fi analyser app test described earlier in this guide gives you a realistic picture of what to expect in your specific home before you buy.
Can I use a second router as a Wi-Fi extender?
Yes, but it requires some configuration. A second router can be set up in one of two modes: Access Point mode (connects to the main router via Ethernet and broadcasts Wi-Fi — effectively a wired access point) or Repeater mode (connects wirelessly to the main router and rebroadcasts the signal, with the same half-speed limitation as a commercial extender). If you already have a spare router, AP mode with an Ethernet cable is the better option. The configuration steps vary by router brand — search for your router model + “access point mode” for specific instructions.
How many mesh nodes do I need for my house?
As a rough guide: one main node covers approximately 100–130m² in a typical UK home. Add one satellite node per additional 80–100m² of floor space, or per additional floor. A two-bed flat: one node. A three-bed house: two nodes (one per floor). A large four or five-bed detached house: three nodes. Most mesh systems are sold in two-pack and three-pack bundles — start with a two-pack and add a node if you still have dead zones, rather than buying three upfront.
Not sure which solution is right for your home? Tell us your house type (flat, semi, detached, Victorian terrace, etc.), approximate size, and where your dead zone is in the comments below. We’ll recommend the best fix for your specific layout — and we respond to every question.