
Want to see your laptop screen on the big TV — without running a cable across the room? You have four reliable ways to do it, and all of them are free. No paid apps, no subscription, and most don’t require any extra hardware at all.
This guide covers every method in plain English: Miracast for Windows users, Chromecast for anyone with a Chrome browser, AirPlay for Mac users, and the built-in screen mirroring on Samsung, LG, and Sony Smart TVs. Pick the one that matches your setup and you’ll be watching on your TV within five minutes.
Which method should you use?
The right method depends on what laptop and TV you have. Here’s a quick reference before you dive in:
| Method | Works on | What you need | Best for |
|---|---|---|---|
| Miracast | Windows 10, Windows 11 | Miracast-compatible TV (most 2016+ Smart TVs) | Windows users — fastest setup, no extras needed |
| Chromecast | Windows, macOS, Chromebook | Chrome browser + Chromecast device or built-in TV | Anyone — works across all operating systems |
| AirPlay | macOS (Monterey+) | Apple TV or AirPlay 2 Smart TV | Mac users — seamless, no setup required |
| Smart TV app | Windows | Samsung, LG, or Sony Smart TV | Smart TV owners — uses the TV’s built-in feature |
Not sure if your TV supports Miracast? Search your TV’s model number followed by “specs” — Miracast compatibility is listed as “Wireless Display,” “Screen Mirroring,” or “Wi-Fi Direct” in the specs sheet.
Quick navigation
- Method 1 — Miracast (Windows Wireless Display)
- Method 2 — Chromecast and Google Cast
- Method 3 — Apple AirPlay (Mac)
- Method 4 — Samsung, LG, and Sony Smart TV screen mirroring
- Troubleshooting — common problems and fixes
- Frequently asked questions
Method 1 — Miracast (Windows Wireless Display)
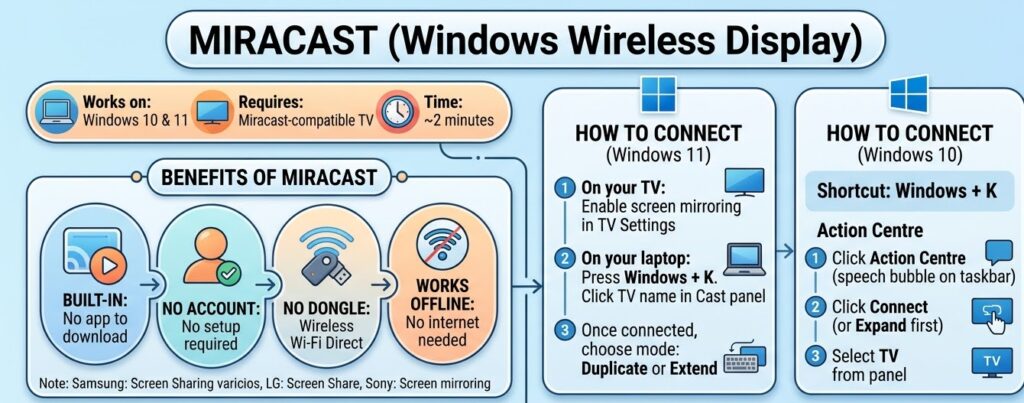
Works on: Windows 10, Windows 11 | Requires: Miracast-compatible TV | Time: 2 minutes
Miracast is the easiest method for Windows users because it is built directly into Windows — no app to download, no account to create, and no dongle needed. It works by creating a direct Wi-Fi connection between your laptop and TV, so it even works when your internet is down.
Most Smart TVs made after 2016 support Miracast, though manufacturers brand it differently: Samsung calls it Screen Sharing, LG calls it Screen Share, and Sony calls it Screen mirroring.
How to connect using Miracast on Windows 11
- On your TV: open Settings on your TV and enable the screen mirroring feature. The name varies by brand — look for Screen Mirroring, Wireless Display, Screen Sharing, or Wi-Fi Direct.
- On your laptop: press Windows + K. A Cast panel will slide in from the right side of your screen.
- Your TV should appear in the list within a few seconds. Click its name to start the connection.
- Once connected, a small toolbar appears at the top of your screen. Click Change projection mode to choose between Duplicate (mirror your laptop screen exactly) or Extend (use the TV as a second monitor).
How to connect using Miracast on Windows 10
The shortcut is the same (Windows + K), but if it does not work on your machine, you can access the Connect panel through the Action Centre instead:
- Click the Action Centre icon in the bottom-right corner of your taskbar (the speech bubble icon).
- Click Connect. If you do not see it, click Expand to show all quick actions.
- Your Miracast-enabled TV will appear in the panel. Click its name to connect.
Is Miracast good for gaming? Miracast introduces a small amount of latency — typically 50–100 ms — which is fine for streaming video or giving presentations but is noticeable during fast-paced games. For gaming, a wired HDMI connection is a better choice.
Does your Windows PC support Miracast?
Most Windows 10 and 11 laptops made after 2015 support Miracast, but a small number do not — usually older machines or budget devices with basic Wi-Fi hardware. To check:
- Press Windows + R, type
dxdiagand press Enter. - Click Save All Information and open the saved text file.
- Search the file for the word Miracast. It will say either “Available, with HDCP” (supported) or “Not Available” (not supported).
If Miracast is not available on your laptop, use Method 2 (Chromecast) instead — it works on any laptop with a Chrome browser.
Method 2 — Chromecast and Google Cast
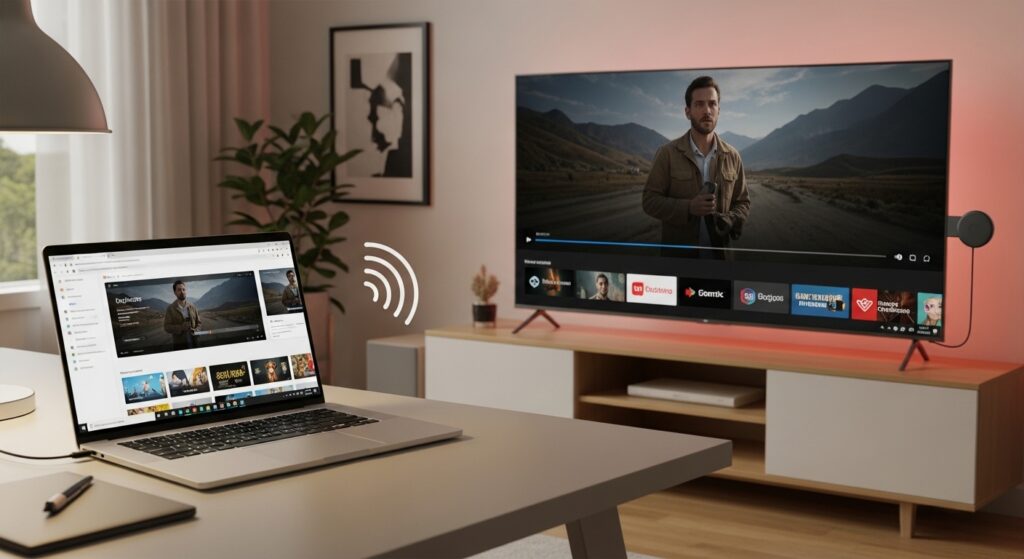
Works on: Windows, macOS, Chromebook | Requires: Chrome browser + Chromecast device or built-in TV | Time: 3 minutes
Chromecast is the most versatile method in this guide because it works on any laptop — Windows, Mac, or Chromebook — as long as you have the Chrome browser and a Chromecast device or a TV with Chromecast built in. It is also the most reliable option for streaming video, since casting a YouTube or Netflix tab sends the video directly to the TV rather than mirroring your screen, which means smoother playback and less battery drain on your laptop.
What you need
- Google Chrome browser (free, download at chrome.google.com if you do not have it)
- A Chromecast device plugged into your TV’s HDMI port, or a TV with Chromecast built in (all Google TV and Android TV models, and many 2019+ Smart TVs)
- Both your laptop and your Chromecast on the same Wi-Fi network
How to cast your laptop screen to a Chromecast
- Open Google Chrome on your laptop.
- Click the three-dot menu ( ⋮ ) in the top-right corner.
- Click Cast.
- A small Cast dialog appears. Click the Sources dropdown at the top of the dialog.
- Select Cast desktop to mirror your entire screen, or leave it on Cast tab to share only the current Chrome tab.
- Your Chromecast device or smart TV will appear in the list below. Click its name to start casting.
Casting a single tab vs casting the desktop
Cast tab sends only what is inside the current Chrome window to your TV. This is the best option for watching YouTube, Netflix (in a browser), or displaying a website on a big screen. Your laptop screen stays independent — you can browse other tabs without it showing on the TV.
Cast desktop mirrors your entire screen, including the taskbar, other apps, and any windows you open. Use this when you want to show a PowerPoint, a video file from your desktop, or anything outside the Chrome browser.
Using Chromecast on a Chromebook
Chromebooks have Cast built into the system — you do not need to go through the Chrome menu. Click the time in the bottom-right corner to open Quick Settings, then click Cast. Select your Chromecast device and your Chromebook screen will mirror to the TV immediately.
Tip: For the smoothest picture, make sure your Wi-Fi router is using the 5 GHz band rather than 2.4 GHz. The 5 GHz band is faster and less congested, which makes a visible difference when casting video. Most modern routers broadcast both — look for a network name ending in “5G” or “5GHz” in your Wi-Fi list.
Method 3 — Apple AirPlay (Mac to TV)
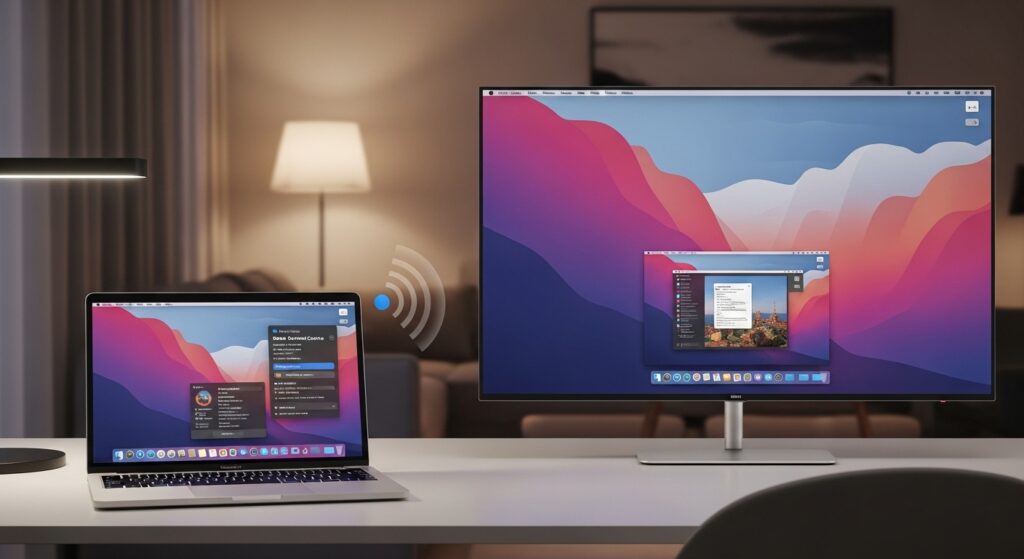
Works on: macOS Monterey and later | Requires: Apple TV or AirPlay 2 Smart TV | Time: 2 minutes
If you have a Mac laptop, AirPlay is by far the most seamless wireless connection method available. It is built into macOS, requires no Chrome browser or extra app, and the picture quality is excellent. The catch is that you need either an Apple TV device or a Smart TV that supports AirPlay 2 — not all TVs do.
Which TVs support AirPlay 2?
AirPlay 2 is built into Smart TVs from the following manufacturers — without needing an Apple TV:
- Samsung: most QLED and OLED models from 2018 onwards
- LG: most OLED and NanoCell models from 2019 onwards
- Sony: most Bravia models from 2019 onwards
- Vizio, TCL, Hisense: selected models from 2020 onwards — check your TV’s spec sheet
If your TV is not on this list, you can still use AirPlay by connecting an Apple TV 4K or Apple TV HD to any TV with an HDMI port.
How to mirror a MacBook to a TV using AirPlay
- Make sure your Mac and your Apple TV or Smart TV are connected to the same Wi-Fi network.
- Click the Control Centre icon in the top-right corner of your Mac’s menu bar (it looks like two toggle switches).
- Click Screen Mirroring.
- A list of available AirPlay devices on your network will appear. Click the name of your TV or Apple TV.
- Your Mac screen will appear on the TV within a few seconds. A blue Screen Mirroring icon will appear in your menu bar to confirm the connection is active.
Mirror vs extend with AirPlay
By default, AirPlay mirrors your Mac display — the TV shows exactly what is on your laptop screen. To use the TV as a separate second screen instead:
- Click the Screen Mirroring icon in your menu bar (the blue rectangle with an arrow).
- Click your TV’s name again and select Use as Separate Display.
In extend mode, you can drag windows from your Mac onto the TV screen and keep your laptop display free for other work.
AirPlay audio only: You can also send audio from your Mac to an Apple TV or AirPlay speaker without mirroring the screen. Click the Sound icon in the menu bar, then select your Apple TV as the output device. This is useful for playing music from your laptop through a TV’s speakers.
Can you use AirPlay on a Windows laptop?
AirPlay is not natively available on Windows. If you need to connect a Windows laptop to an Apple TV, the best alternatives are Miracast (Method 1) if your Apple TV is Apple TV 4K (3rd gen or later, which supports AirPlay from Windows via a third-party receiver app), or Chromecast (Method 2) as a universal fallback.
Method 4 — Samsung, LG, and Sony Smart TV Screen Mirroring
Works on: Windows | Requires: Samsung, LG, or Sony Smart TV | Time: 3 minutes
If you own a Samsung, LG, or Sony Smart TV, your TV has its own branded screen mirroring feature. These features are built on top of Miracast or Chromecast protocols under the hood — so the steps on the laptop side are the same as Methods 1 and 2 — but the TV settings menu path is different for each brand.
Samsung TVs — Smart View and Screen Sharing
- On your Samsung TV remote, press the Home button.
- Navigate to Settings → General → External Device Manager → Device Connection Manager.
- Make sure Screen Sharing is switched on.
- On your Windows laptop, press Windows + K and select your Samsung TV from the list.
- A prompt may appear on your TV screen. Use your remote to select Allow.
Alternatively, Samsung’s free SmartThings app (available for Windows from the Microsoft Store) has a Smart View button that connects to your TV with one click — useful if you cast to a Samsung TV regularly.
LG TVs — Screen Share (WiDi / Miracast)
- Press the Settings button on your LG remote.
- Go to All Settings → General → Screen Share (on some models: Connection → Screen Share).
- Make sure Screen Share is enabled.
- On your Windows laptop, press Windows + K and select your LG TV from the Cast list.
On LG TVs with Google TV or Android TV, you can also cast directly from the Chrome browser using the Chromecast method (Method 2) — no settings change needed on the TV.
Sony TVs — Screen mirroring
Sony Bravia TVs fall into two categories: Android TV / Google TV models (2016 onwards on most ranges) and older non-Android models.
Sony Android TV / Google TV models: Chromecast is built in. Open Chrome on your laptop, go to the three-dot menu, click Cast, and your Sony TV will appear in the list automatically — no TV settings change needed.
Sony non-Android models:
- Press the Home button on your Sony remote.
- Go to Settings → Wireless and Networks → Wi-Fi Direct Settings → Advanced Settings.
- Enable Screen mirroring.
- On your Windows laptop, press Windows + K and select your Sony TV.
Troubleshooting — Common Problems and Fixes
Most wireless connection issues come down to one of five causes: the TV’s mirroring feature is turned off, the devices are on different Wi-Fi networks, the Wi-Fi band is too congested, a driver is outdated, or a firewall is blocking the connection. Here are the specific fixes for the most common problems.
TV not showing up in the Cast list on Windows
This is the most common issue and has three likely causes:
- TV mirroring is off: go to your TV’s settings and enable Screen Mirroring, Screen Sharing, or Wireless Display. The TV must be in discovery mode to appear in your Windows Cast list.
- Different Wi-Fi networks: for Chromecast, both devices must be on exactly the same network. If you have a guest network and a main network, make sure both the laptop and Chromecast are on the same one. (Miracast does not use your router at all, so this only applies to Chromecast.)
- Wi-Fi adapter driver needs updating: open Device Manager, expand Network adapters, right-click your Wi-Fi adapter and select Update driver. An outdated driver is a common cause of the Cast list appearing empty.
Screen mirroring keeps disconnecting
- Move your laptop closer to your Wi-Fi router — Miracast and Chromecast both degrade with distance and obstructions.
- Switch your router to the 5 GHz band if it is currently on 2.4 GHz. Congestion on 2.4 GHz causes frequent drops.
- On Windows, go to Device Manager → Network adapters → your Wi-Fi adapter → Properties → Power Management and untick Allow the computer to turn off this device to save power. Windows sometimes powers down the Wi-Fi adapter mid-session.
No sound on the TV when mirroring
When you connect to a wireless display, Windows sometimes does not automatically switch the audio output to the TV. To fix this:
- Right-click the speaker icon in your taskbar.
- Select Sound settings (Windows 11) or Playback devices (Windows 10).
- Under Output, change the device from your laptop speakers to your Wireless Display or TV name.
Laggy or low-quality picture
A laggy mirror is almost always a Wi-Fi bandwidth problem. In order of impact:
- Switch to the 5 GHz Wi-Fi band — this is the biggest single improvement you can make.
- Reduce the resolution: right-click your desktop, go to Display settings, and lower the resolution before connecting. A 1080p mirror is far less demanding than 4K.
- Close other applications and browser tabs on your laptop that are using the network.
- For Chromecast: in the Cast dialog, click the down arrow next to your device name and select Standard quality instead of High Definition if the picture stutters.
“This PC doesn’t support Miracast” error
This message means your laptop’s Wi-Fi adapter either does not support Miracast or its driver needs updating. Try the driver update fix above first. If Miracast still shows as unavailable after a driver update, your Wi-Fi hardware does not support the standard. In that case, use Chromecast (Method 2) instead — it works on any laptop with Chrome, regardless of Wi-Fi hardware.
Cast option is greyed out in Chrome
This usually means Chrome is out of date or the Cast feature has been disabled in Chrome flags. Update Chrome to the latest version first (chrome://help). If the option is still greyed out, type chrome://flags in the address bar, search for Load Media Router Component Extension, set it to Enabled, and relaunch Chrome.
Frequently Asked Questions
Can I connect a laptop to a TV wirelessly without Wi-Fi?
Yes — Miracast does not use your home Wi-Fi router at all. It creates a direct peer-to-peer Wi-Fi Direct connection between your laptop and TV. So even if your broadband is down or you are in a location without a router, Miracast will still work as long as both devices support it. Chromecast and AirPlay, however, do require both devices to be on the same Wi-Fi network.
Does my TV need to be a Smart TV to connect wirelessly?
No. Any TV with an HDMI port can become wireless-ready. Plug a Chromecast device (available from around £30) into the HDMI port and you instantly get Google Cast support on any TV. Alternatively, a cheap Miracast HDMI dongle (under £20) adds Miracast support to any TV. You do not need to replace your television.
Why is my screen mirroring so laggy?
The most common cause is your Wi-Fi router broadcasting on the congested 2.4 GHz band. Switch your laptop and streaming device to a 5 GHz network — the difference is usually immediate and dramatic. Other causes include the router being far away, other devices heavily using the network, or an outdated Wi-Fi driver on your laptop. Updating the Wi-Fi driver in Device Manager is worth trying if 5 GHz is already in use.
Can I connect a MacBook to a non-Apple TV wirelessly?
Yes, two ways. First, use the Chrome browser and cast via Chromecast — this works on macOS just as well as it does on Windows. Second, AirPlay 2 is built into Samsung TVs (2018 and later), LG TVs (2019 and later), and Sony Bravia TVs (2019 and later), so no Apple TV is needed if you own one of those models. Open Control Centre on your Mac, click Screen Mirroring, and your Samsung or LG TV will appear in the list directly.
What is the difference between screen mirroring and casting?
Screen mirroring duplicates your entire laptop display onto the TV in real time. Everything visible on your laptop — including the desktop, taskbar, notifications, and all open windows — appears on the TV simultaneously. Casting sends a specific piece of content (a video, a browser tab, a photo) directly to the TV while your laptop screen stays fully independent. Casting uses less battery, produces a smoother video picture, and lets you keep using your laptop for other tasks while content plays on the TV. For watching videos, casting is almost always the better choice. For presentations or demos, screen mirroring is what you want.
Summary — Which method to use
To recap the fastest path for each setup:
- Windows laptop + any Smart TV: press Windows + K and connect via Miracast. Zero setup, zero extras needed.
- Any laptop + Chromecast or Google TV: open Chrome, click the three-dot menu, select Cast, then Cast desktop. Works on Windows, Mac, and Chromebook equally.
- MacBook + Samsung, LG, or Sony TV (2018+): open Control Centre, click Screen Mirroring, and select your TV. No Apple TV required.
- TV without Smart features: plug in a Chromecast dongle (from £30) and use Method 2. Any TV, any laptop.
The most common reason wireless mirroring fails is a TV setting that has not been turned on — so if your TV is not showing up, that is the first place to check. The troubleshooting section above covers everything else.
Have a question or found a method that worked (or did not work) for your specific TV? Leave a comment below — it helps other TechDIY readers find the right fix faster.