Your drivers are the invisible layer between Windows and your hardware — and when they go wrong, everything from your GPU to your Wi-Fi card can stop working properly. This guide walks you through updating Windows drivers the right way: safely, confidently, and with a recovery plan if something goes wrong.
We cover three update methods in order of risk (from lowest to highest), with dedicated sections for GPU drivers, third-party driver software to avoid, and exactly what to do if an update breaks something. Whether you’re on Windows 10 or Windows 11, all steps are clearly labeled.
Before you start: Jump to Section 3 first and create a restore point. It takes two minutes and means any bad driver update is fully reversible.
1. What Drivers Are and Why They Matter
A driver is a small piece of software that translates Windows’ instructions into commands your hardware understands. When you move your mouse, press a key, or launch a game, a driver is doing the translation work in the background. Without the right driver, Windows either can’t communicate with a device at all, or communicates badly — causing crashes, poor performance, or missing features.
Outdated drivers cause real, measurable problems:
- Performance loss — an outdated GPU driver can cost you frames in games and slow down video rendering
- System crashes (BSODs) — driver errors are one of the most common causes of Blue Screen of Death events on Windows
- Security vulnerabilities — some drivers have been exploited in malware attacks; manufacturers release patches to close these holes
- Hardware not working — a new device, a recent Windows update, or a corrupted driver file can leave a device with a yellow exclamation mark in Device Manager
The good news: most driver updates are straightforward. A small number — particularly GPU drivers — require a bit more care. This guide covers both cases clearly, so you always know what you’re doing before you do it.
2. Should You Update? When to Update and When to Leave Them Alone
Here’s the counter-intuitive truth that most driver guides skip: you should not automatically update every driver you see. Some updates add features you don’t need, bundle unwanted software, or introduce new bugs. The right question isn’t “is there a newer version?” — it’s “do I have a reason to update?”
Update your drivers when:
- A device is not working or showing errors in Device Manager
- You’re experiencing BSODs that mention a specific driver file (e.g.,
nvlddmkm.sys) - You’ve installed new hardware that needs a fresh driver
- A security patch has been released for a driver you use
- You’re having performance problems with your GPU or network adapter
- A game or application requires a newer driver version
Leave your drivers alone when:
- Everything is working correctly — “if it ain’t broke, don’t fix it” is legitimate advice for stable machines
- The update is cosmetic or adds features to bundled software you don’t use (common with GPU drivers)
- You’re on a production machine where stability matters more than having the latest version
- A new GPU driver was released within the last week — wait for the community to flag any issues first
How to check your current driver version
Before deciding whether to update, check what you already have installed:
- Press Win + X and select Device Manager
- Expand the relevant category (e.g., Display adapters)
- Right-click your device and select Properties
- Go to the Driver tab — you’ll see the driver version and date
A driver date from two or three years ago on a GPU is worth investigating. A chipset driver from the same period on a machine with no problems? Leave it alone.
3. Before You Update: Create a Restore Point
⚠ Do this before every driver change. A System Restore point takes about two minutes to create and gives you a complete safety net. If a driver update causes problems, you can undo everything without reinstalling Windows. Most driver update guides skip this step entirely — don’t.
Why restore points protect you
Windows System Restore captures your system’s configuration — including installed drivers — at a specific point in time. If a driver update causes a BSOD, a broken display, or a device that stops working, you can roll back your entire system to exactly where it was before the update. It does not affect your personal files.
How to create a restore point (Windows 10 and Windows 11)
- Press Win + S and search for Create a restore point, then open it
- In the System Properties window, select your C: drive (or System drive) under Protection Settings
- Click Configure and make sure Turn on system protection is selected, then click OK
- Click Create…, give it a descriptive name (e.g., “Before GPU driver update – March 2026”)
- Click Create and wait for Windows to confirm it was created successfully
Verify it was created
Back in the System Properties window, click System Restore… and then Next — your new restore point should appear at the top of the list with today’s date and time. If it’s there, you’re protected. You can close without proceeding further.
Full recovery instructions using this restore point are in Section 9 — bookmark it before continuing.
4. Method 1 — Windows Update (The Safest, Easiest Route)
For most hardware on most PCs, Windows Update is the best place to start. Drivers delivered through Windows Update have been tested by Microsoft for stability and compatibility, and Windows can automatically roll them back if something goes wrong. Start here unless you have a specific reason to go directly to the manufacturer.
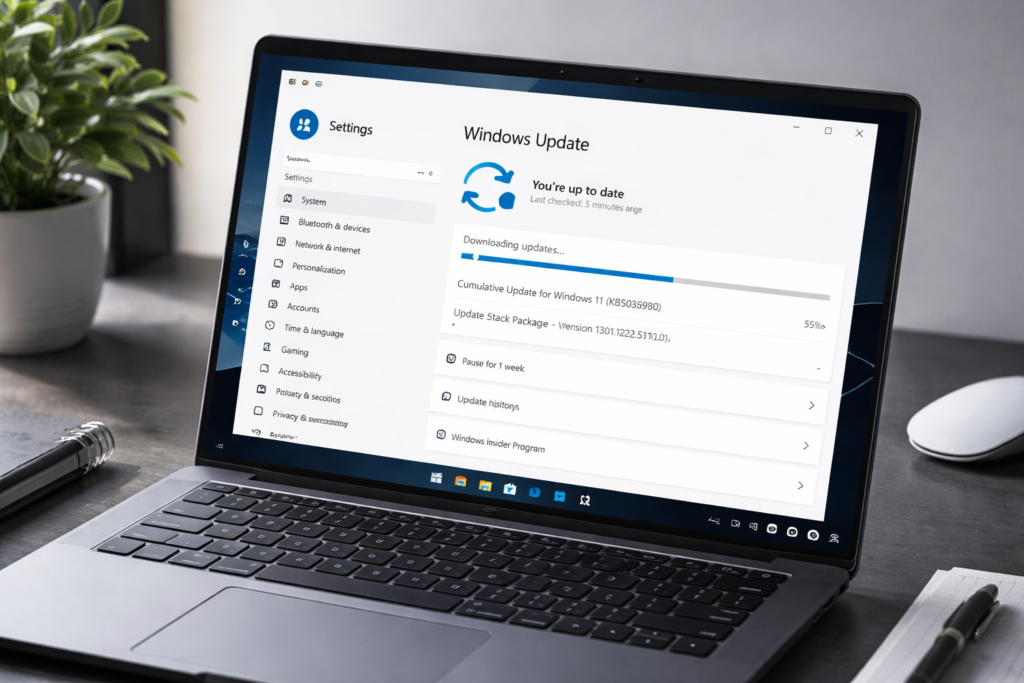
Windows 11: checking for driver updates
- Open Settings → Windows Update
- Click Check for updates
- After the check completes, look for Advanced options → Optional updates
- Expand Driver updates — this is where most driver updates appear, and it’s where many users miss them entirely
- Select the drivers you want to install and click Download & install
Windows 10: checking for driver updates
- Open Settings → Update & Security → Windows Update
- Click Check for updates
- Click View optional updates (this link appears below the main update status if optional updates are available)
- Expand Driver updates, select what you need, and click Download and install
Pros and cons of Windows Update for drivers
| Pros | Cons |
|---|---|
| Microsoft-tested for Windows compatibility | Often lags behind manufacturer releases by weeks or months |
| Supports automatic rollback | Not all hardware is covered — especially older or niche devices |
| No extra software required | GPU drivers here are almost never the latest version |
| Lowest risk update method | Optional updates section is easy to overlook |
When to move to Method 2 or 3: If Windows Update doesn’t find a driver for your device, shows a driver error, or you specifically need a newer GPU driver for gaming or creative work, proceed to the methods below.
5. Method 2 — Device Manager (Manual Update for Specific Devices)

Device Manager is the right tool when a specific device is misbehaving — showing a yellow exclamation mark, not working at all, or listed as an “Unknown device.” It lets you update individual drivers without touching anything else on your system.
Opening Device Manager
Press Win + X and select Device Manager, or press Win + R, type devmgmt.msc, and press Enter.
Identifying the device that needs attention
- A yellow exclamation mark (⚠) next to a device means there’s a driver problem
- A device listed as “Unknown device” means Windows has no driver for it at all
- A down arrow on a device means it’s been manually disabled
Updating automatically (searches Windows Update and local files)
- Right-click the device you want to update
- Select Update driver
- Choose Search automatically for drivers
- Windows will check its local driver store and Windows Update for a match
Installing manually via INF file (advanced)
When you’ve downloaded a driver directly from the manufacturer (usually a .zip file containing an .inf file), use this method:
- Extract the downloaded driver package to a folder (e.g.,
C:DriversRealtek) - Right-click the device in Device Manager → Update driver
- Choose Browse my computer for drivers
- Click Browse and navigate to the folder containing the extracted driver files
- Make sure Include subfolders is checked, then click Next
Reading the driver version and date
Right-click any device → Properties → Driver tab. The driver version number and driver date tell you exactly what’s installed. Compare these to what’s on the manufacturer’s website to decide whether an update is worth pursuing.
6. Method 3 — Downloading Directly from the Manufacturer
For performance-critical drivers — particularly GPU, chipset, and network — downloading directly from the manufacturer gives you the most current version, fastest. This is the method that gamers, content creators, and IT professionals use. The trade-off: you’re responsible for picking the right driver for your hardware.
GPU drivers
First, confirm your GPU model: Device Manager → Display adapters → right-click → Properties → Details tab → Hardware IDs.
- Nvidia: Download from nvidia.com/drivers or use the GeForce Experience app. Choose Game Ready Driver for gaming, Studio Driver for video editing, 3D work, or creative applications (Studio drivers are more stable but update less often).
- AMD: Download from amd.com/support or use the AMD Adrenalin software. See Section 8 for AMD-specific installation options.
- Intel Arc: Download from intel.com/download-center or use the Intel Arc Control app (formerly Intel Graphics Command Center).
Chipset drivers
Chipset drivers control how your CPU communicates with other components. They’re less frequently updated but worth keeping reasonably current.
- Intel chipset: Use the Intel Driver & Support Assistant (DSA) — it scans your system and finds the right packages automatically
- AMD chipset: Download AMD Chipset Software from amd.com/support — enter your processor model to find the right version
Network and Wi-Fi drivers
To find the right network driver, you need your adapter model. In Device Manager, expand Network adapters, right-click your Wi-Fi or Ethernet adapter, and go to Properties → Details → Hardware IDs. Common manufacturers and their download pages:
- Intel Wi-Fi / Ethernet: intel.com/download-center (use Intel DSA for automatic detection)
- Realtek: realtek.com or your laptop manufacturer’s support page
- Qualcomm / Killer: qualcomm.com or your PC manufacturer’s support page
Audio drivers
For most users, audio driver updates should only happen if audio is actually broken. If you need to update:
- Realtek HD Audio: Download from your motherboard or laptop manufacturer’s support page — search by your device model number
- Dell, HP, Lenovo: Use their official support tools (Dell SupportAssist, HP Support Assistant, Lenovo System Update) which automatically identify your audio hardware
7. Driver Update Software — What’s Safe, What to Avoid
One of the most common questions about driver updates is: “Should I just use a driver updater app to do all of this automatically?” The short answer is no — and understanding why will save you a lot of trouble.
Why third-party driver updaters are mostly unnecessary
Windows already has two legitimate update channels: Windows Update and Device Manager. Manufacturer tools (covered in Section 6) handle everything else for free. Third-party driver scanner apps add nothing to this picture — except risk.
The specific risks
- Bundled adware and PUPs: Tools like IObit Driver Booster are regularly flagged by Malwarebytes and other security tools as Potentially Unwanted Programs (PUPs) due to bundled software installed during setup
- Incorrect driver matches: These tools scan your hardware IDs and match them against a database, but the matching logic is imprecise — they can install a driver for a similar but not identical device, which causes more problems than it solves
- Paywalled features: Most tools show you a list of “outdated” drivers, then require a paid subscription to actually install them — creating urgency around updates that may not be necessary
- Unsigned or modified drivers: Some tools in this category install drivers that haven’t been through Windows Hardware Quality Labs (WHQL) testing
Tools to avoid by name:
- Driver Booster (IObit) — consistently flagged as PUP/grayware; Reddit’s r/techsupport explicitly warns against it
- Driver Easy — paywalls most functionality; unnecessary given free alternatives
- DriverPack Solution — known for aggressive bundled software installation
- SlimDrivers / DriverFinder — similar paywalled model, questionable driver sourcing
The two legitimate exceptions (first-party tools only)
There are exactly two driver management apps worth using — and both are made by the hardware manufacturers themselves:
- Intel Driver & Support Assistant (DSA): Scans your Intel hardware and finds correct chipset, network, and Wi-Fi driver updates directly from Intel. Free, no bundling, trustworthy.
- AMD Adrenalin Software: First-party AMD tool for GPU and chipset drivers. Reliable, regularly updated, no bundled third-party software.
Red flags to watch for in any driver tool
- Requires payment to download or install drivers it has “found”
- Displays alarming language about how many drivers are “outdated” or “dangerous”
- Installation includes unchecking boxes to decline additional software
- Not made by the hardware manufacturer or Microsoft
8. GPU Driver Updates — Special Considerations for Gamers and Creatives
GPU drivers deserve their own section because they’re updated more frequently than any other driver type, and they’re the single most common cause of driver-related BSODs and crashes. Nvidia and AMD both release new GPU drivers roughly monthly, each one optimized for recently released games and fixing bugs from the previous version.
Why GPU drivers update so often
Unlike chipset or audio drivers, GPU drivers are essentially small operating systems in themselves. Every major game release typically comes with a companion “Game Ready” driver. Bug fixes, new rendering features, and security patches layer on top of each other across monthly releases. This is why GPU driver management is a continuous activity, not a one-time setup.
Nvidia: Game Ready vs. Studio Driver — which to choose
| Driver Type | Best For | Update Frequency | Priority |
|---|---|---|---|
| Game Ready Driver (GRD) | Gaming, streaming, general use | Monthly (sometimes more) | Latest features and game optimisations first |
| Studio Driver (SD) | Video editing, 3D rendering, creative apps | Less frequent | Stability and creative app compatibility first |
If you primarily game, use Game Ready. If you primarily do creative work and stability matters more than day-one game optimisations, use Studio Driver. You can switch between them at any time.
Nvidia: DCH vs. Standard driver
Modern Windows 10/11 systems use DCH (Declarative, Componentized, Hardware Support Apps) drivers. To check which type you have: open GeForce Experience → hamburger menu → System Information → look for “DCH” in the driver version details. Most new PCs use DCH — if yours does, always download DCH drivers from nvidia.com.
AMD: Adrenalin installation options
When installing AMD Adrenalin software, you’re given two options:
- Full Install: Installs the driver plus the full Adrenalin software overlay, performance monitoring, and game-specific features. Choose this if you want AMD’s feature set.
- Minimal Install: Installs the display driver only, without the Adrenalin UI. Choose this if you just want the driver and don’t need the extra software.
Clean installation — when to use DDU
A standard driver update installs over the existing driver, which is fine for routine updates. A clean installation using Display Driver Uninstaller (DDU) removes all traces of the previous driver before installing the new one. Use DDU when:
- You’re switching GPU brands (Nvidia to AMD or vice versa)
- A standard update has left graphical corruption, flickering, or recurring crashes
- You want a completely fresh driver state on a new build
To use DDU safely: boot into Safe Mode first (this prevents Windows from reinstalling the driver automatically during the process), run DDU, select your GPU brand, click “Clean and restart,” then install your new driver normally after the reboot.
Should you always install the latest GPU driver?
Not necessarily. New GPU driver releases sometimes ship with regressions — performance drops, new bugs, or compatibility issues — that get discovered by the community within the first few days and hotfixed within a week or two. Waiting 7–10 days after a new Nvidia or AMD driver release before installing is practical advice, not superstition. Check the release thread on r/nvidia or r/AMD to see if the new version has known issues before you install it.
9. If Something Goes Wrong — Roll Back or Uninstall a Driver
Driver updates occasionally break things. Here are three recovery options in escalating order — try them in sequence until your system is stable again.
If you created a restore point in Section 3, Option B (System Restore) is usually the fastest and most complete recovery method. Go there first if your system is unstable after a driver update.
Option A — Roll Back Driver in Device Manager
This works when the previous driver was saved by Windows (usually after a recent single-driver update):
- Press Win + X → Device Manager
- Find the problematic device, right-click → Properties
- Go to the Driver tab and click Roll Back Driver
- Select a reason and click Yes
- Restart your PC when prompted
Note: The Roll Back Driver button is greyed out if Windows doesn’t have a saved previous driver. In that case, move to Option B.
Option B — System Restore (the reliable fallback)
- Press Win + S, search for Create a restore point, and open it
- Click System Restore… → Next
- Select the restore point you created before the driver update (check the timestamp)
- Click Next → Finish and confirm
- Your PC will restart and restore itself — this takes several minutes
Option C — Safe Mode driver removal (when Windows won’t boot normally)
If the driver update has left Windows unable to boot to the desktop:
- Force restart your PC three times in a row — on the third attempt, Windows will boot into the Automatic Repair environment
- Go to Advanced options → Startup Settings → Restart
- Press F4 to boot into Safe Mode
- In Safe Mode, open Device Manager, find the problematic driver, right-click → Uninstall device, and check “Delete the driver software for this device”
- Restart normally — Windows will install a basic driver, giving you a working system to reinstall from
For GPU driver removal in Safe Mode, use DDU (Display Driver Uninstaller) for a thorough clean-up before reinstalling.
Reading a BSOD stop code to identify the faulty driver
When Windows crashes with a Blue Screen, it displays a stop code. Some stop codes point directly at a driver file:
nvlddmkm.sys— Nvidia display driveratikmpag.sysoramdkmdag.sys— AMD display driveriaStorA.sys— Intel storage driverDRIVER_IRQL_NOT_LESS_OR_EQUAL— generic driver conflict, check recently updated drivers first
If you can’t read the screen, open Event Viewer (Win + S → Event Viewer) → Windows Logs → System → look for Critical events near the time of the crash.
10. Driver Maintenance Schedule and Best Practices
Rather than panic-updating whenever you see a notification, build a simple, sustainable maintenance routine. This table gives you a sensible update cadence by driver type:
| Driver Type | Recommended Frequency | Priority | Risk If Skipped |
|---|---|---|---|
| GPU (gaming) | Monthly (wait 7–10 days after release) | High | Performance loss, missed game optimisations, potential BSOD |
| GPU (creative/stable) | Every 2–3 months (Studio Driver) | Medium | Missing compatibility updates for creative apps |
| Chipset | Quarterly | Medium | Minor performance and compatibility issues — low immediate risk |
| Network / Wi-Fi | Only if issues arise | Low (unless broken) | Existing setup usually stable; update if speeds drop or connection drops |
| Audio | Only if issues arise | Low (unless broken) | Audio issues are self-evident; no need to proactively update |
| Printer / peripheral | Only after OS upgrade or new hardware | Low | Device may stop working after major Windows updates |
Best practices to carry forward
- Always create a restore point before any driver change — add it as a non-negotiable first step every time, even for routine updates
- Check manufacturer release notes before installing — knowing what changed (new game support, a security patch, a bug fix) helps you decide whether the update is worth doing today or can wait
- Wait 7–10 days on new GPU driver releases — let the community surface any regressions before you install
- Keep a simple log of driver versions — a text file with the date, device, and driver version before and after each update means you can identify exactly what changed if problems appear later
How to disable automatic driver installation via Windows Update (optional)
If you prefer to manage all driver updates manually — common on gaming rigs where you want full control over GPU drivers — you can prevent Windows from automatically installing drivers:
- Press Win + S → search for View advanced system settings
- Click the Hardware tab → Device Installation Settings
- Select No (your device might not work as expected) and click Save Changes
With this setting, Windows will no longer auto-install drivers from Windows Update. You remain in full control of what gets installed and when.
Frequently Asked Questions
Is it safe to update drivers?
Yes — for most drivers, updates are routine and low-risk. The key precaution is creating a System Restore point before any update (see Section 3), which gives you a one-click undo if anything goes wrong. GPU driver updates carry slightly more risk than other driver types, which is why Section 8 covers them in detail.
Should I use Driver Booster?
No. Driver Booster (IObit) is consistently flagged as Potentially Unwanted Program (PUP) grayware by security tools including Malwarebytes. It bundles additional software, uses alarming language to upsell its paid version, and can install incorrect drivers. Use Windows Update, Device Manager, or manufacturer tools instead — all free and reliable.
What happens if I update the wrong driver?
The most common outcomes are: the device stops working correctly, you see a new BSOD, or display output changes unexpectedly. All of these are recoverable. Use Roll Back Driver in Device Manager (Option A in Section 9), or use your System Restore point (Option B) to undo the change completely.
How do I roll back a driver in Windows 11?
Open Device Manager (Win + X → Device Manager), find the device, right-click → Properties → Driver tab → Roll Back Driver. If the button is greyed out, the previous driver was not saved — use System Restore instead (Settings → System → Recovery → Advanced startup, or search for “Create a restore point”).
Do I need to update drivers on Windows 11?
Windows 11 handles many driver updates automatically via Windows Update. You don’t need to manually hunt for driver updates in most cases. The exceptions are GPU drivers (where you benefit from the latest manufacturer releases for gaming) and any device that’s not working correctly. For everything else, Windows 11’s automatic updates are sufficient.