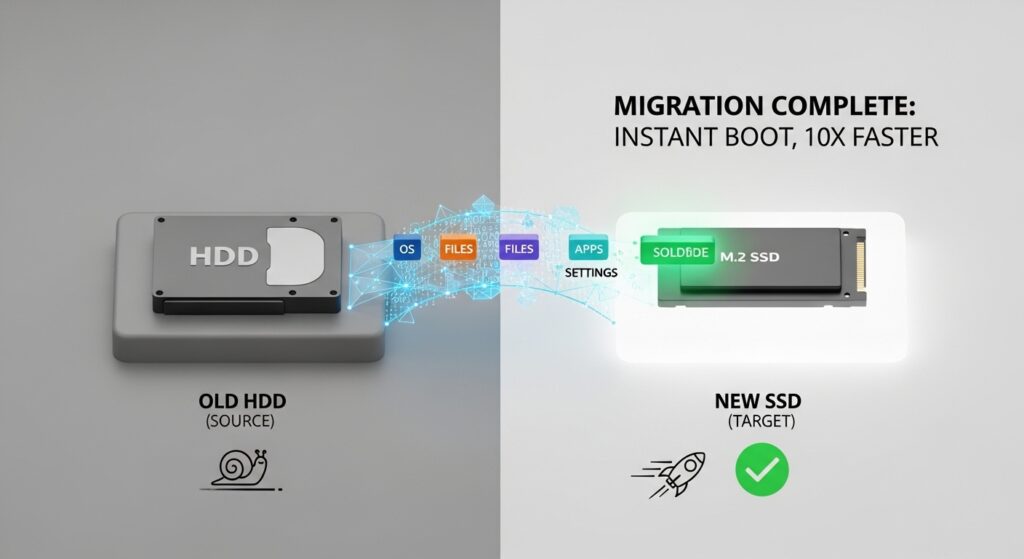
Upgrading to a new SSD is one of the most impactful hardware changes you can make. A laptop that crawls through a 90-second boot can drop to under 10 seconds. Apps that took 20 seconds to open launch almost instantly. File transfers that felt like watching paint dry complete in seconds.
The only intimidating part is moving everything across — and that’s exactly what this guide covers. Rather than starting from scratch with a clean Windows reinstall, migrating (cloning) your drive copies everything as it is: your operating system, all installed apps, every setting, your files, and your Windows activation. When you’re done, your new SSD behaves exactly like your old drive — just dramatically faster.
This guide covers the full process for Windows (10 and 11) using free software, with a dedicated section for Mac users at the end.
Jump to a section:
- What you need before you start
- SATA vs NVMe — choosing the right SSD
- Step 1 — Back up your data
- Step 2 — Connect and initialise the new SSD
- Step 3 — Clone the drive with Macrium Reflect
- Alternative cloning tools
- Step 4 — Verify the clone before swapping
- Step 5 — Physically install the new SSD
- Step 6 — First boot and post-migration checks
- What to do with the old drive
- Mac SSD migration
- Troubleshooting common problems
- FAQ
Process overview and time estimates
| Stage | Time needed |
|---|---|
| Back up data | 30–60 min |
| Connect and initialise SSD | 5 min |
| Clone the drive | 30–90 min |
| Verify the clone | 10 min |
| Physical drive swap | 10–30 min |
| Post-migration checks | 10 min |
Total: approximately 1.5–3.5 hours, most of which is unattended cloning time.
What you need before you start
Gather everything on this list before beginning. Stopping mid-process to find a missing cable or download software wastes time and increases risk.
The new SSD
Must be at least as large as the used space on your current drive (not the total size). Check in File Explorer — right-click your C: drive → Properties. See the SATA vs NVMe section to make sure you buy the right type.
A USB enclosure or adapter
This lets you connect the new SSD to your PC externally via USB while cloning — before it’s installed inside. A USB-to-SATA enclosure costs around £10–£15; a USB-to-NVMe enclosure £15–£25. This is the item most guides forget to mention, and the one that causes the most confusion.
Cloning software
Macrium Reflect Free is recommended for most users (macrium.com). Samsung and Crucial SSD owners can alternatively use their manufacturer’s free migration tool. All are covered in this guide.
Screwdrivers
Most laptops use a Phillips #0 or #1 for the back panel. Most desktop cases use larger Phillips screws. Some ultrabooks use Torx or pentalobe screws — check your model at ifixit.com if unsure.
An external backup drive
Non-negotiable. Before any drive operation, back up your important files. See Step 1 for details.
SATA vs NVMe — choosing the right SSD for your system
Not all SSDs are the same type, and buying the wrong one means it won’t physically fit or your system won’t support it. Here’s the quick version.
| SATA SSD (2.5″) | NVMe SSD (M.2) | |
|---|---|---|
| Speed | ~550 MB/s read | 3,000–7,000 MB/s read |
| Connector | SATA cable + power cable | M.2 slot (no cables) |
| Best for | Replacing old HDDs; older laptops | Modern laptops and desktops |
| Price | Lower | Slightly higher; falling fast |
| Requires | 2.5″ drive bay | M.2 slot on motherboard |
How to check which type your PC supports
- Press Ctrl + Shift + Esc to open Task Manager
- Click Performance → select your disk
- If it shows “Type: SSD” and the speeds listed are above 1,000 MB/s, you likely have NVMe already. If it shows “HDD” or speeds around 100–150 MB/s, you have a spinning hard drive and should check whether your system has an M.2 slot available.
- For a definitive answer: search your laptop model + “specs” online, or for desktops, check your motherboard manual for M.2 slot availability.
Recommended SSDs by type (2026)
- Budget SATA: Crucial MX500 — reliable, affordable, widely compatible
- Mainstream SATA: Samsung 870 EVO — excellent endurance, trusted brand
- Mainstream NVMe (PCIe 3.0): Samsung 980, WD Blue SN570 — great value
- Performance NVMe (PCIe 4.0): Samsung 980 Pro, WD Black SN850X — maximum speed for modern systems
M.2 slot warning: Not all M.2 slots support NVMe. Some older motherboards have M.2 slots that only support SATA — buying an NVMe drive for these slots means it simply won’t work. Check your motherboard or laptop specifications carefully before purchasing.
Step 1 — Back up your data before anything else
This step is not optional. Cloning is reliable but not infallible. A power cut, software bug, or loose cable during the cloning process could leave both drives in an incomplete state. Back up before you begin — every time, no exceptions.
What to back up
At minimum, copy these folders to an external drive:
C:\Users\[YourName]\DocumentsC:\Users\[YourName]\DesktopC:\Users\[YourName]\DownloadsC:\Users\[YourName]\Pictures- Any project folders or work files stored elsewhere on the drive
Quick backup options
- Manual copy: plug in an external drive, drag the folders above onto it. Simple and reliable for personal files.
- Windows Backup: Settings → Update & Security → Backup → Add a drive. Creates an automatic backup to an external drive.
- File History: Control Panel → System and Security → File History → select a drive → Turn on.
- Cloud backup: ensure OneDrive or Google Drive has synced all your important files before starting.
Verify the backup: After copying, open the external drive and spot-check a few files. Confirm they open correctly. A backup you haven’t verified is only slightly better than no backup.
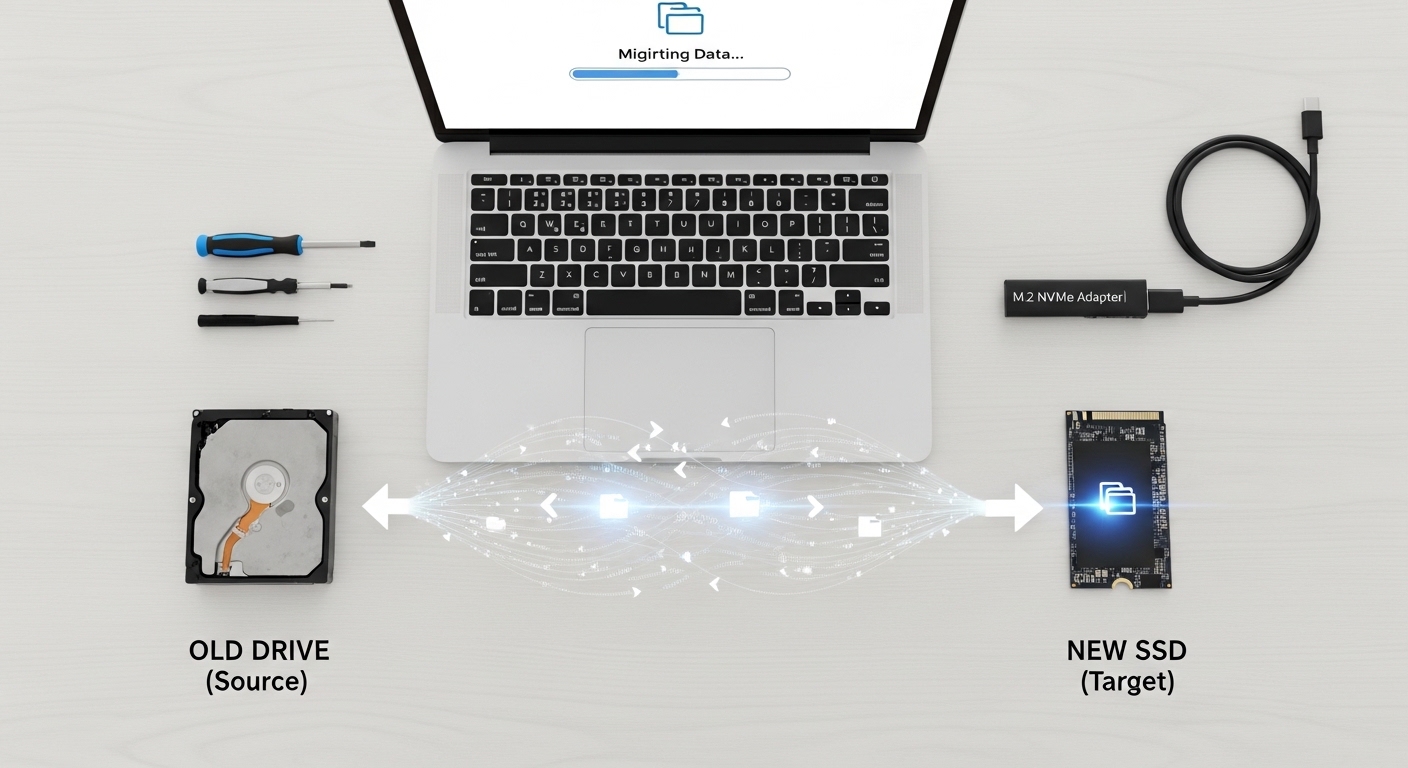
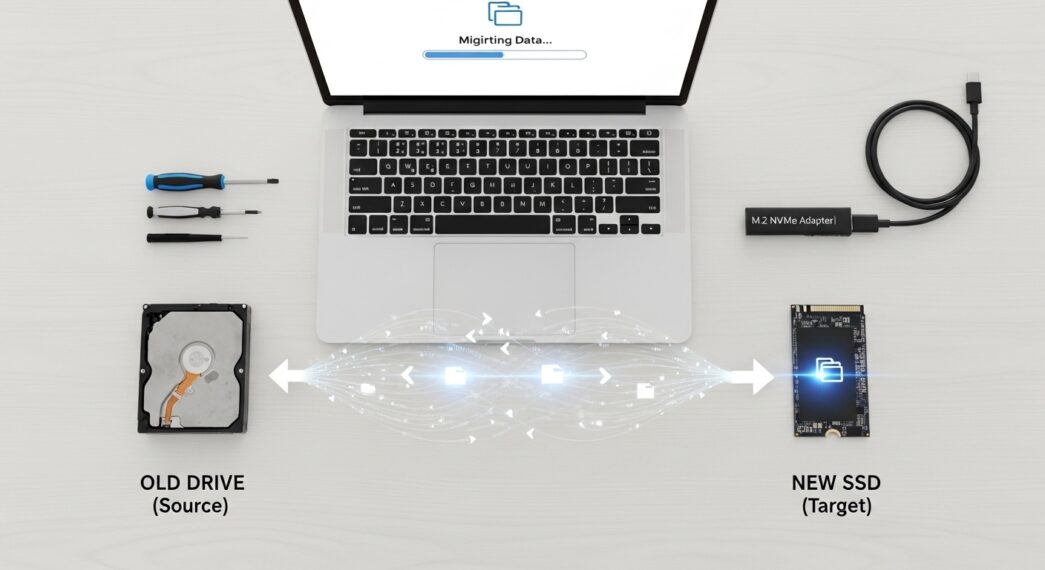
Step 2 — Connect and initialise the new SSD
Before cloning, you need to connect the new SSD to your PC externally so the cloning software can see both drives at the same time.
- Place the new SSD into your USB enclosure or adapter and connect it to your PC via USB
- Open Disk Management: press Windows + X → click Disk Management
- If a pop-up appears asking you to initialise the disk, select GPT and click OK. GPT is correct for virtually all modern PCs running Windows 10 or 11 on UEFI firmware.
- The new drive should now appear as “Unallocated” — this is correct. Do not create partitions or format it. The cloning software handles that.
Drive not appearing in Disk Management? Try a different USB port (use a USB 3.0 port — blue or labelled “SS” — for best results). Also check Device Manager (Windows + X → Device Manager) to see if the drive appears there with an error. Sometimes a USB driver update or a reboot resolves detection issues.
Step 3 — Clone the drive with Macrium Reflect Free
Why Macrium Reflect: it’s free, actively maintained, handles Windows 10 and 11 perfectly, automatically manages the partition layout, and has a clean interface that doesn’t require technical knowledge to use. It’s the tool recommended by most IT professionals for one-off migrations.
Download and install
- Go to macrium.com/macrium-reflect-free and download the free version
- Install it on your current drive (C:) as normal — this is fine, as the cloning process reads from C: but writes only to the new SSD
- Launch Macrium Reflect
Running the clone
- In the main window, you’ll see a list of detected drives. Identify your current drive (C:) — it will show your Windows partition and the total used space.
- Click “Clone this disk” below your current drive’s listing
- On the next screen, click “Select a disk to clone to” and choose your new SSD. Double-check the size matches what you bought — do not select the wrong drive.
- After selecting the destination, you’ll see a partition layout preview at the bottom. If your new SSD is larger than the source drive, you need to resize the partitions to use the extra space. Click the destination partition (usually labelled C:) and select “Cloned Partition Properties”. Drag the right edge to fill the available space, or click “Maximum Size”.
- Review the complete partition layout. Confirm that all partitions from the source are listed: typically an EFI System Partition (ESP), a Microsoft Reserved Partition (MSR), the main Windows (C:) partition, and a Recovery partition. All must be included for the drive to be bootable.
- Click Finish → OK → Clone Now
During the clone
- Do not use the computer for other tasks — close all other applications before starting
- Keep the laptop plugged into power — do not let it sleep or run on battery
- Cloning time is typically 30–90 minutes for a 250–500 GB drive, depending on source drive speed
- A progress bar shows estimated time remaining — it’s normal for this to fluctuate
Clone failed with disk errors? Your source drive may have file system errors. Open Command Prompt as administrator and run: chkdsk C: /f /r — this scans and repairs the drive. Restart when prompted, let the scan complete, then retry the clone.
Alternative cloning tools
If you’d prefer not to use Macrium Reflect, or if your SSD manufacturer provides their own tool, here are the best alternatives:
Samsung Data Migration (Samsung SSDs only)
The simplest option if you bought a Samsung SSD. Launch the app, select your source disk, click Start — it handles everything automatically including partition resizing. Free from samsung.com/semiconductor/minisite/ssd/download/tools/.
Crucial Storage Executive (Crucial/Micron SSDs only)
Equally simple, built specifically for Crucial SSDs. Includes a “Clone Drive” option in the left sidebar. Free from crucial.com.
EaseUS Todo Backup Free
A user-friendly alternative to Macrium with a similar interface. The free tier covers disk cloning. Good choice if you find Macrium’s interface confusing.
Clonezilla (Advanced users)
Open-source, free, boots from a USB stick, works with any drive brand and any OS. The most powerful option but entirely command-line/menu driven — best suited to IT professionals or users comfortable with technical interfaces. Handles bad sectors better than GUI tools. Download from clonezilla.org.
Which tool to choose: If you bought a Samsung or Crucial SSD, use the manufacturer tool — it’s the simplest path. For any other brand, use Macrium Reflect Free. Only use Clonezilla if you’re comfortable with a text-based interface or if the other tools fail due to bad sectors on the source drive.
Step 4 — Verify the clone before swapping drives
This is the most important step most guides skip. Before physically removing your old drive, test-boot from the new SSD while both drives are still connected. If the clone failed, your old drive is still intact and you can try again. If you skip this step and swap drives first, a failed clone leaves you with nothing to boot from.
How to test-boot from the new SSD
- With the new SSD still connected via USB, restart your PC
- As the PC starts, press the key to enter your BIOS/UEFI. The key varies by manufacturer:
- Dell: F2 or F12
- HP: F10 or Esc
- Lenovo: F1, F2, or Enter then F1
- ASUS: Del or F2
- MSI: Del
- Acer: F2 or Del
- In the BIOS, navigate to Boot or Boot Order
- Move the new SSD to the top of the boot order (it may be listed by its model name or as a USB device if connected externally)
- Save and exit (F10 on most systems)
- Windows should boot from the new SSD. If it does, you’ll see the normal Windows login screen
- Log in and verify: open a few apps, check your Documents folder, confirm files are all present
If Windows won’t boot from the new SSD
- Confirm BIOS is set to UEFI mode (not Legacy/CSM) — cloned GPT drives require UEFI
- In Macrium Reflect, there’s a “Fix Windows Boot Problems” option under the Tools menu — run this and retry
- Ensure all partitions (EFI, MSR, C:, Recovery) were included in the clone — check the clone log in Macrium
Once Windows boots successfully from the new SSD, restore your original boot order in BIOS and continue to the physical installation.
Step 5 — Physically install the new SSD
Power off completely before opening your PC. Shut down Windows fully (not sleep or hibernate), then unplug the power cable from the wall. For laptops, hold the power button for 5 seconds after shutdown to discharge any residual current.
Anti-static precautions
Before handling any internal components, touch a bare metal surface on the PC case (with it unplugged) to discharge static electricity. Alternatively, use an anti-static wrist strap. Static discharge can silently damage SSDs and other components.
Installing in a laptop
- Photograph the back panel before removing any screws — you’ll thank yourself during reassembly
- Remove all back panel screws and carefully lift the panel (a plastic pry tool helps avoid scratching)
- Locate the existing drive:
- M.2 NVMe: a small rectangular chip held by a single screw, plugged into a slot on the motherboard
- 2.5″ SATA: a larger drive connected by a flat cable, usually held by a bracket
- Remove the retaining screw (M.2) or bracket screws (2.5″ SATA) and disconnect the old drive
- Insert the new SSD:
- M.2: insert at a roughly 30-degree angle, push gently into the slot, then press flat and secure with the retaining screw
- 2.5″ SATA: connect the data cable and power cable, slide into the bay, secure with bracket screws
- Reassemble the back panel and replace all screws
Installing in a desktop
- Remove the side panel (usually two thumb screws at the rear)
- For M.2 NVMe: locate the M.2 slot on the motherboard (often labelled M.2_1 or similar), remove the standoff screw, insert the SSD at 30 degrees, press flat, replace the screw
- For 2.5″ SATA: mount in a drive bay, connect a SATA data cable from the drive to the motherboard, connect a SATA power cable from the PSU
- If you’re keeping the old drive as secondary storage, leave it connected — just ensure the new SSD is set as the boot drive in BIOS
- Replace the side panel
Laptop repairability note: Many modern ultrabooks — including MacBooks from 2016 onwards and various Dell XPS and HP Spectre models — have storage soldered directly to the motherboard and cannot be upgraded. Before purchasing a new SSD for a laptop, check its repairability at ifixit.com. Search for your exact model.
Step 6 — First boot and post-migration checks
With the new SSD installed, power on and work through this checklist to confirm everything is running correctly.
1. Confirm Windows boots from the new SSD
- If your PC doesn’t boot automatically, enter BIOS and set the new SSD as the primary boot device
- Once in Windows, open Disk Management (Windows + X) and confirm C: is now your new SSD — the model name should match your new drive
2. Check Windows activation
- Go to Settings → System → Activation
- It should display “Windows is activated with a digital licence”
- If it shows “Windows is not activated”, run the Activation Troubleshooter on the same page — this resolves most cases automatically by re-linking the licence to the hardware
3. Verify TRIM is enabled
TRIM is an SSD-specific feature that keeps performance from degrading over time. Confirm it’s active:
- Open Command Prompt as administrator (search for cmd → right-click → Run as administrator)
- Type this command and press Enter:
fsutil behavior query DisableDeleteNotifyA result of 0 means TRIM is enabled — you’re good. If it returns 1, TRIM is disabled. Re-enable it with:
fsutil behavior set DisableDeleteNotify 04. Extend the OS partition if needed
If you didn’t resize partitions during cloning, or if the C: drive isn’t using the full SSD capacity:
- Open Disk Management
- If there is “Unallocated” space after the C: partition, right-click C: → Extend Volume → follow the wizard to claim the remaining space
5. Run a speed test
Download CrystalDiskMark (free from crystalmark.info) and run a benchmark on the new SSD. Compare the sequential read speed against the manufacturer’s rated spec. An NVMe drive rated at 3,500 MB/s should show within 10–15% of that figure. If speeds are dramatically lower, check that the drive is in the correct slot (some M.2 slots run at half speed) and that firmware is up to date.
6. Update SSD firmware
Check the manufacturer’s website or tool for firmware updates for your specific SSD model. Firmware updates often improve performance and fix reliability issues — worth doing once after installation.
What to do with the old drive
Once you’ve confirmed the new SSD is working perfectly, you have several options for the old drive.
Option 1 — Repurpose as secondary storage
If your PC has a spare drive bay, install the old drive as secondary storage for files, media, and downloads. Format it to remove the old Windows installation: open Disk Management → right-click the old drive → Delete Volume → New Simple Volume → NTFS.
Option 2 — Use as a portable backup drive
Put the old drive into the same USB enclosure you used for cloning. It becomes an external backup drive. Format it first (as above) to remove the old Windows installation before using it for backups.
Option 3 — Keep temporarily as a fallback
Store the old drive safely for 2–4 weeks without formatting it. If any problem emerges with the new SSD, you still have a working bootable drive to fall back to. After that period, format or repurpose it.
Option 4 — Securely wipe and sell or recycle
Before disposing of a drive containing personal data, wipe it securely. Use DBAN (dban.org) for HDDs or the manufacturer’s secure erase tool for SSDs — a standard format does not fully remove recoverable data.
Do not keep the old drive as a bootable backup. Having two drives with identical Windows installations causes activation and system identity conflicts. If you want to keep the old drive as a fallback, leave it as-is but do not connect it as a bootable drive after the migration is confirmed working.
Mac SSD migration
Check repairability first. All Macs with Apple Silicon (M1, M2, M3, M4) and most Intel MacBooks from 2016 onwards have storage soldered directly to the board — it cannot be upgraded. Before proceeding, search your exact Mac model at ifixit.com and check the repairability score. Upgradeable models include older MacBook Pros (2015 and earlier), Mac Pros, and some Mac minis.
If your Mac does have upgradeable storage, there are two reliable approaches.
Method 1 — Time Machine + macOS Recovery (recommended)
This is Apple’s native approach and the most reliable for a complete system migration.
- Back up to Time Machine: connect an external drive and run a full Time Machine backup (System Settings → General → Time Machine → Back Up Now). Wait for it to complete.
- Install the new SSD in place of the old one (physical installation varies by model — follow iFixit’s guide for your specific Mac)
- Boot into macOS Recovery: on Intel Macs, hold Cmd + R at startup. On Apple Silicon Macs, hold the power button until the Recovery screen appears.
- Select Reinstall macOS and follow the prompts to install a fresh copy of macOS onto the new SSD
- During the setup process, select Migrate from Time Machine Backup and point Migration Assistant to your backup drive
- macOS will restore all your apps, settings, and files onto the new SSD
Method 2 — Carbon Copy Cloner or SuperDuper (bootable clone)
Both tools create a bootable clone of your Mac’s drive — equivalent to Macrium Reflect on Windows.
- Carbon Copy Cloner: robust, feature-rich, free 30-day trial (sufficient for a one-time migration), available at bombich.com
- SuperDuper: simpler interface, free version covers basic cloning, available at shirt-pocket.com
Connect the new SSD via USB, select source and destination in the app, and run the clone. Then boot from the new SSD to verify before swapping.
Troubleshooting common migration problems
New SSD not detected in Disk Management or BIOS
For M.2 drives: check that your motherboard supports NVMe (not just SATA M.2) if you bought an NVMe drive. Try reseating the drive — remove and reinsert firmly. Check BIOS for an NVMe enable/disable setting. For SATA drives: confirm both the data cable and power cable are fully connected.
PC won’t boot after installing new SSD
Enter BIOS and check two things: (1) the new SSD is first in the boot order, and (2) Boot Mode is set to UEFI (not Legacy/CSM). A GPT-cloned drive requires UEFI mode. If the drive was cloned as MBR (legacy), it requires Legacy boot mode instead — check which partition style your drive uses in Disk Management.
New SSD has unallocated space after cloning
The partitions weren’t resized during cloning. Fix in Windows: open Disk Management → right-click the C: partition → Extend Volume → follow the wizard to claim the unallocated space. This is safe to do at any time after migration.
Windows not activated after migration
A digital licence is tied to your hardware profile. Replacing the boot drive can trigger a re-validation request. Go to Settings → System → Activation → Troubleshoot. In most cases the troubleshooter re-links the licence automatically. If the hardware change was significant (new motherboard as well), you may need to contact Microsoft support and explain the upgrade.
Clone failed: “sector read errors” or drive errors
The source drive has bad sectors. Run chkdsk C: /f /r in an elevated Command Prompt, restart to allow the scan to run, then retry the clone. If errors persist, try Clonezilla — it has better bad-sector handling than GUI tools and can often complete clones that Macrium cannot.
New SSD is slower than expected
Check: (1) TRIM is enabled — see Step 6. (2) The M.2 slot you’re using runs at full PCIe x4 bandwidth — some secondary M.2 slots run at PCIe x2 (half speed). Check your motherboard manual. (3) SSD firmware is up to date. (4) For NVMe drives, confirm the slot supports PCIe 4.0 if you bought a PCIe 4.0 drive.
Need to clone to a smaller SSD
This is only possible if the used data on your source drive is less than the new SSD’s capacity. First, shrink the C: partition in Disk Management (right-click C: → Shrink Volume) to just above your used space. Then clone as normal — Macrium will fit the partition onto the smaller drive.
Frequently asked questions
Can I migrate Windows to a new SSD without reinstalling?
Yes — this is exactly what cloning does. Tools like Macrium Reflect Free copy your entire Windows installation, all apps, settings, and files to the new SSD. The result is identical to your current setup, just running on faster hardware. No reinstallation, no licence reactivation headaches, no reinstalling applications.
How long does it take to clone a drive to an SSD?
Typically 30–90 minutes for a drive with 200–500 GB of data. The speed depends primarily on how fast your source drive can read — an HDD source will be slower than an SSD source. The new SSD’s write speed has less impact. You can leave it running unattended once started.
Is cloning a drive the same as copying files?
No — they’re fundamentally different. Copying files moves the data but not the partition structure, boot records, or system files needed to make a drive bootable. Cloning copies everything: the partition layout, the EFI boot partition, the operating system, and all files. Only a cloned drive can be used to boot a PC.
Does cloning carry over Windows activation?
Yes, in almost all cases. A Windows digital licence is linked to your hardware profile. When you clone the drive and use it in the same PC, Windows recognises the same hardware and the licence carries over automatically. You may see a brief re-validation prompt on first boot, which the Activation Troubleshooter resolves in minutes.
What size SSD do I need?
At minimum, the new SSD must have more capacity than the used space on your current drive (not the total drive size). Check this in File Explorer: right-click C: → Properties → note the “Used space” figure. In practice, buy at least the next size up — if you’re using 180 GB, buy a 500 GB SSD rather than a 256 GB one, to leave room for future growth.
Can I clone an SSD to a smaller SSD?
Only if your used data fits on the smaller drive. You’ll need to shrink the C: partition in Disk Management first to make it smaller than the destination SSD’s total capacity. Then clone as normal. Macrium Reflect handles this well as long as the partition fits.
Final thoughts
An SSD migration takes a few hours but delivers results you’ll notice every single day. Once you experience a sub-10-second boot and near-instant app launches, it’s hard to go back. The process is reliable when followed carefully — the key steps most people trip over are forgetting to resize partitions during cloning, skipping the verification boot before swapping drives, and not checking TRIM after installation.
If you’re running CrystalDiskMark before and after the upgrade, it’s worth sharing your before/after speeds in the comments — both as a useful benchmark for other readers and because the numbers are often genuinely impressive.
Have a question about your specific hardware or ran into a problem not covered here? Leave a comment below — we read and respond to every one.